> ## Documentation Index
> Fetch the complete documentation index at: https://scaledfoundations-rebrand.mintlify.site/llms.txt
> Use this file to discover all available pages before exploring further.
# Sessions
*GRID Session* is a unified environment for robotics development that combines interactive coding, simulation, telemetry, and data management.
## Overview
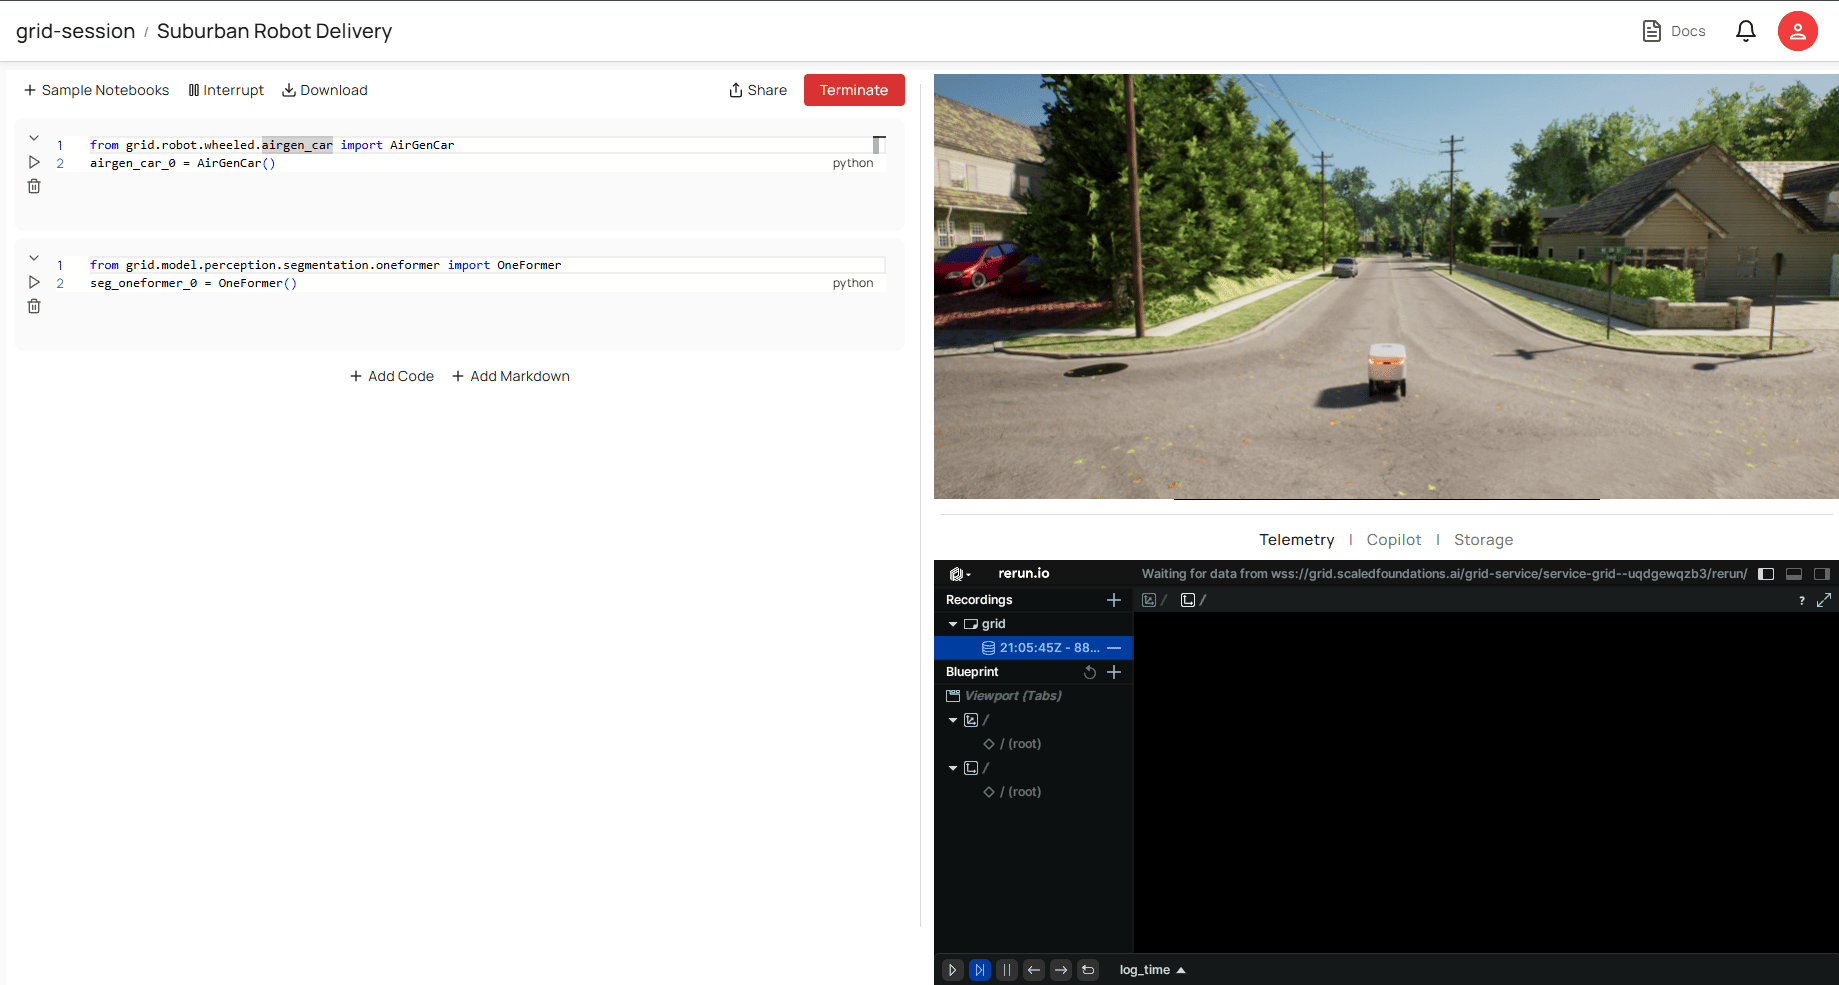 A **Session** is your development environment, where you can:
* **Prototype code** in Jupyter-style notebooks (left pane).
* **View and interact** with a real-time simulation (right pane).
* **Monitor telemetry** and logs in a dedicated panel (bottom-right).
* **Leverage AI Copilot** to generate actions or code from plain language.
* **Store and retrieve** data in the built-in file storage.
This integrated interface facilitates quick iteration: you write code in the left pane, immediately see your changes affect the simulation on the right, and track telemetry data as you go.
## Layout
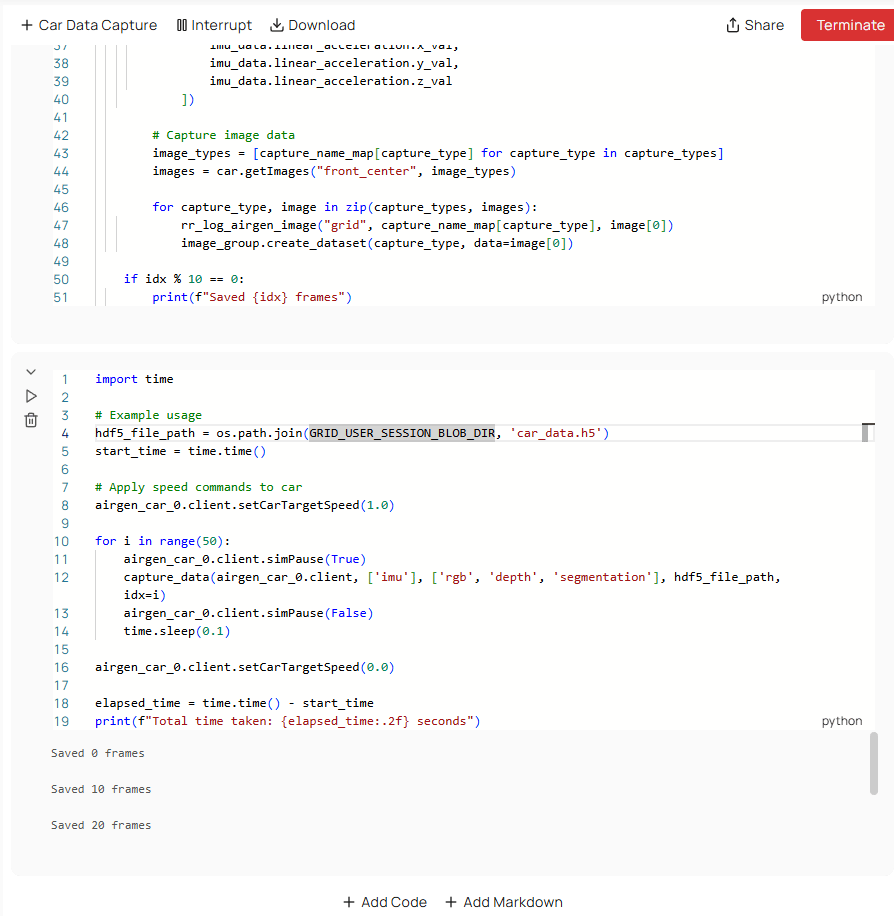
1. **Notebook Panel (Left)**
* Write Python code in a Jupyter-like interface.
* Execute cells to run code, instantiate robots or models, and visualize results in the simulation view.
* Organize your workflow with Markdown cells for documentation and commentary.
A **Session** is your development environment, where you can:
* **Prototype code** in Jupyter-style notebooks (left pane).
* **View and interact** with a real-time simulation (right pane).
* **Monitor telemetry** and logs in a dedicated panel (bottom-right).
* **Leverage AI Copilot** to generate actions or code from plain language.
* **Store and retrieve** data in the built-in file storage.
This integrated interface facilitates quick iteration: you write code in the left pane, immediately see your changes affect the simulation on the right, and track telemetry data as you go.
## Layout
1. **Notebook Panel (Left)**
* Write Python code in a Jupyter-like interface.
* Execute cells to run code, instantiate robots or models, and visualize results in the simulation view.
* Organize your workflow with Markdown cells for documentation and commentary.
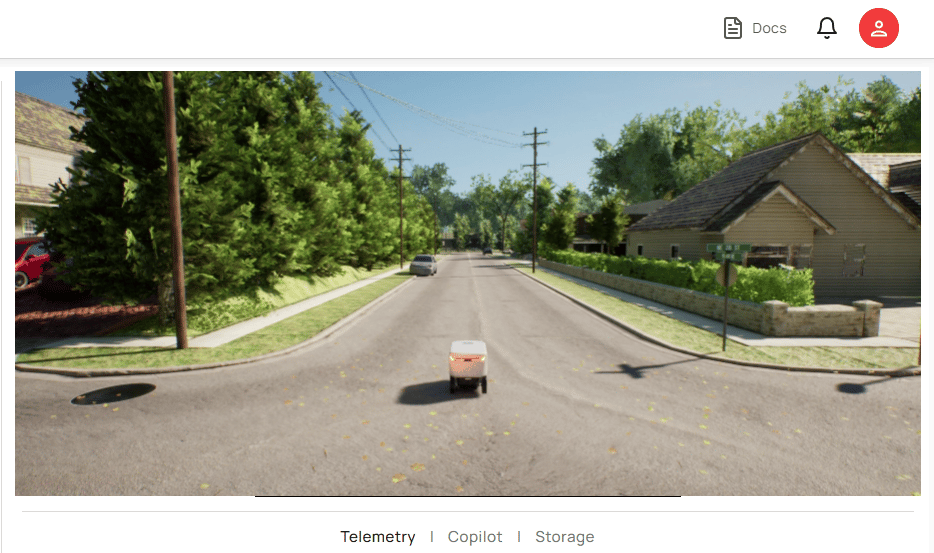
 2. **Simulation Panel (Right)**
* Displays the simulation environment in which your code runs.
* Interact with the simulation scene (e.g., position objects, change parameters).
2. **Simulation Panel (Right)**
* Displays the simulation environment in which your code runs.
* Interact with the simulation scene (e.g., position objects, change parameters).
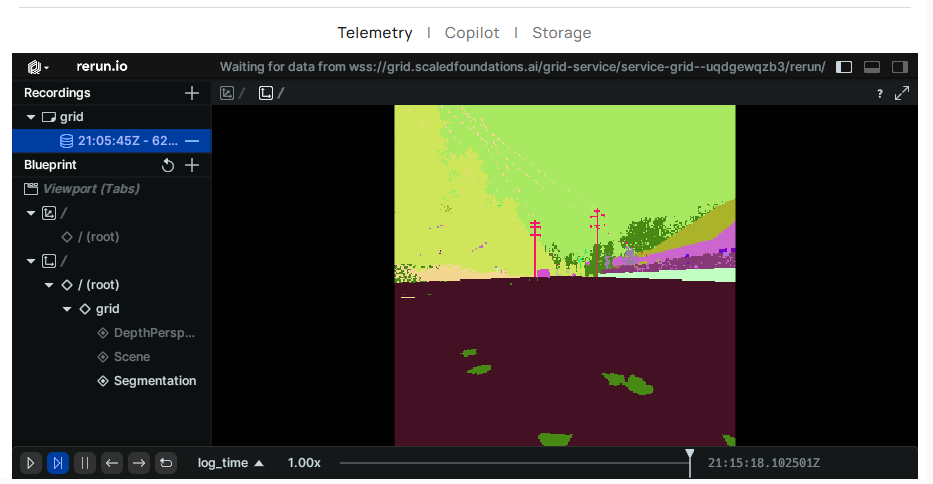
 3. **Telemetry Tab (Bottom-Right)**
* Powered by Rerun, the Telemetry tab logs and visualizes robot states, sensor data, and results of AI models.
* Helps you track performance metrics, movement paths, and any events or anomalies over time.
3. **Telemetry Tab (Bottom-Right)**
* Powered by Rerun, the Telemetry tab logs and visualizes robot states, sensor data, and results of AI models.
* Helps you track performance metrics, movement paths, and any events or anomalies over time.
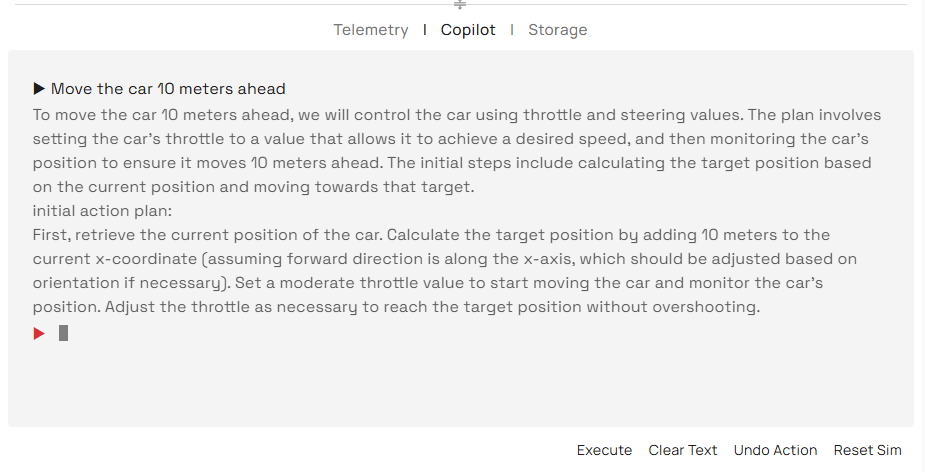
 4. **Copilot Tab (Bottom-Right)**
* Natural Language to Code conversion to help you prototype quickly.
* Enter plain-language commands and Copilot will generate Python code tailored to your environment and simulation.
* Seamless integration with your Notebook: copy/paste or insert Copilot-generated code directly into your active session.
4. **Copilot Tab (Bottom-Right)**
* Natural Language to Code conversion to help you prototype quickly.
* Enter plain-language commands and Copilot will generate Python code tailored to your environment and simulation.
* Seamless integration with your Notebook: copy/paste or insert Copilot-generated code directly into your active session.
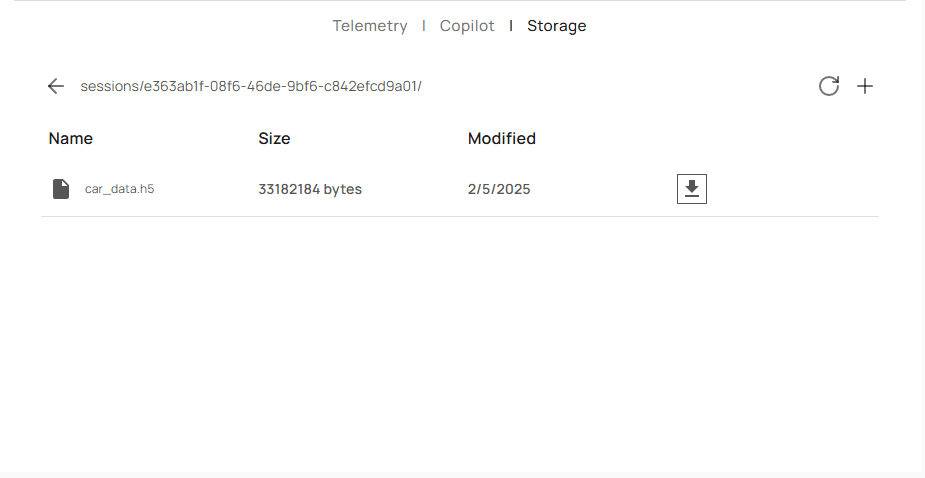
 5. **Storage**
* Access saved data (images, logs, configuration files, etc.) generated during the session.
* Download or upload files needed for your simulation or code.
* Data persists across session restarts as long as you keep the session active.
5. **Storage**
* Access saved data (images, logs, configuration files, etc.) generated during the session.
* Download or upload files needed for your simulation or code.
* Data persists across session restarts as long as you keep the session active.
 ## Typical Workflow
1. **Initialize Objects**
* In the left notebook panel, import the relevant robotics modules.
* Create simulation objects, such as robots and sensors, by running `AirGenCar()`, `OneFormer()`, or other constructors.
2. **Interact with the Simulation**
* Observe real-time changes in the simulation window when you execute your code.
* Manipulate objects: move them around, apply commands, or adjust sensor inputs.
* Ensure your setup reflects the scenario you want to prototype (e.g., suburban delivery routes, robotic arms in a warehouse, etc.).
3. **Monitor Telemetry**
* As the simulation runs, switch to the Telemetry tab.
* Inspect logs and visualize path trajectories or sensor data in real time.
* Use this data for debugging or performance optimization.
4. **Use Copilot**
* When you have a desired outcome in mind but aren’t sure how to implement it, open the Copilot.
* Describe what you want in plain language (e.g., “Move the robot forward for 5 seconds”).
* Integrate the auto-generated code snippet into your Notebook and execute it to see results.
5. **Save & Download Data**
* As your session progresses, snapshots, logs, or analysis results will be saved in the **Storage** panel.
* You can rename or structure files as needed, then download them for further offline analysis.
Step onto the GRID—where every idea takes shape and takes off.
## Typical Workflow
1. **Initialize Objects**
* In the left notebook panel, import the relevant robotics modules.
* Create simulation objects, such as robots and sensors, by running `AirGenCar()`, `OneFormer()`, or other constructors.
2. **Interact with the Simulation**
* Observe real-time changes in the simulation window when you execute your code.
* Manipulate objects: move them around, apply commands, or adjust sensor inputs.
* Ensure your setup reflects the scenario you want to prototype (e.g., suburban delivery routes, robotic arms in a warehouse, etc.).
3. **Monitor Telemetry**
* As the simulation runs, switch to the Telemetry tab.
* Inspect logs and visualize path trajectories or sensor data in real time.
* Use this data for debugging or performance optimization.
4. **Use Copilot**
* When you have a desired outcome in mind but aren’t sure how to implement it, open the Copilot.
* Describe what you want in plain language (e.g., “Move the robot forward for 5 seconds”).
* Integrate the auto-generated code snippet into your Notebook and execute it to see results.
5. **Save & Download Data**
* As your session progresses, snapshots, logs, or analysis results will be saved in the **Storage** panel.
* You can rename or structure files as needed, then download them for further offline analysis.
Step onto the GRID—where every idea takes shape and takes off.