> ## Documentation Index
> Fetch the complete documentation index at: https://scaledfoundations-rebrand.mintlify.site/llms.txt
> Use this file to discover all available pages before exploring further.
# Hello GRID
This tutorial provides a detailed, step-by-step guide to configuring and launching your custom session on the GRID platform. In this session, you will:
* Set up a custom scenario using the neighbourhood scene.
* Configure an SUV vehicle with custom camera settings.
* Add a LiDAR sensor with tailored parameters.
* Integrate an AI model for image segmentation.
## Configuring a Custom Session
Follow these steps to launch your custom scenario:
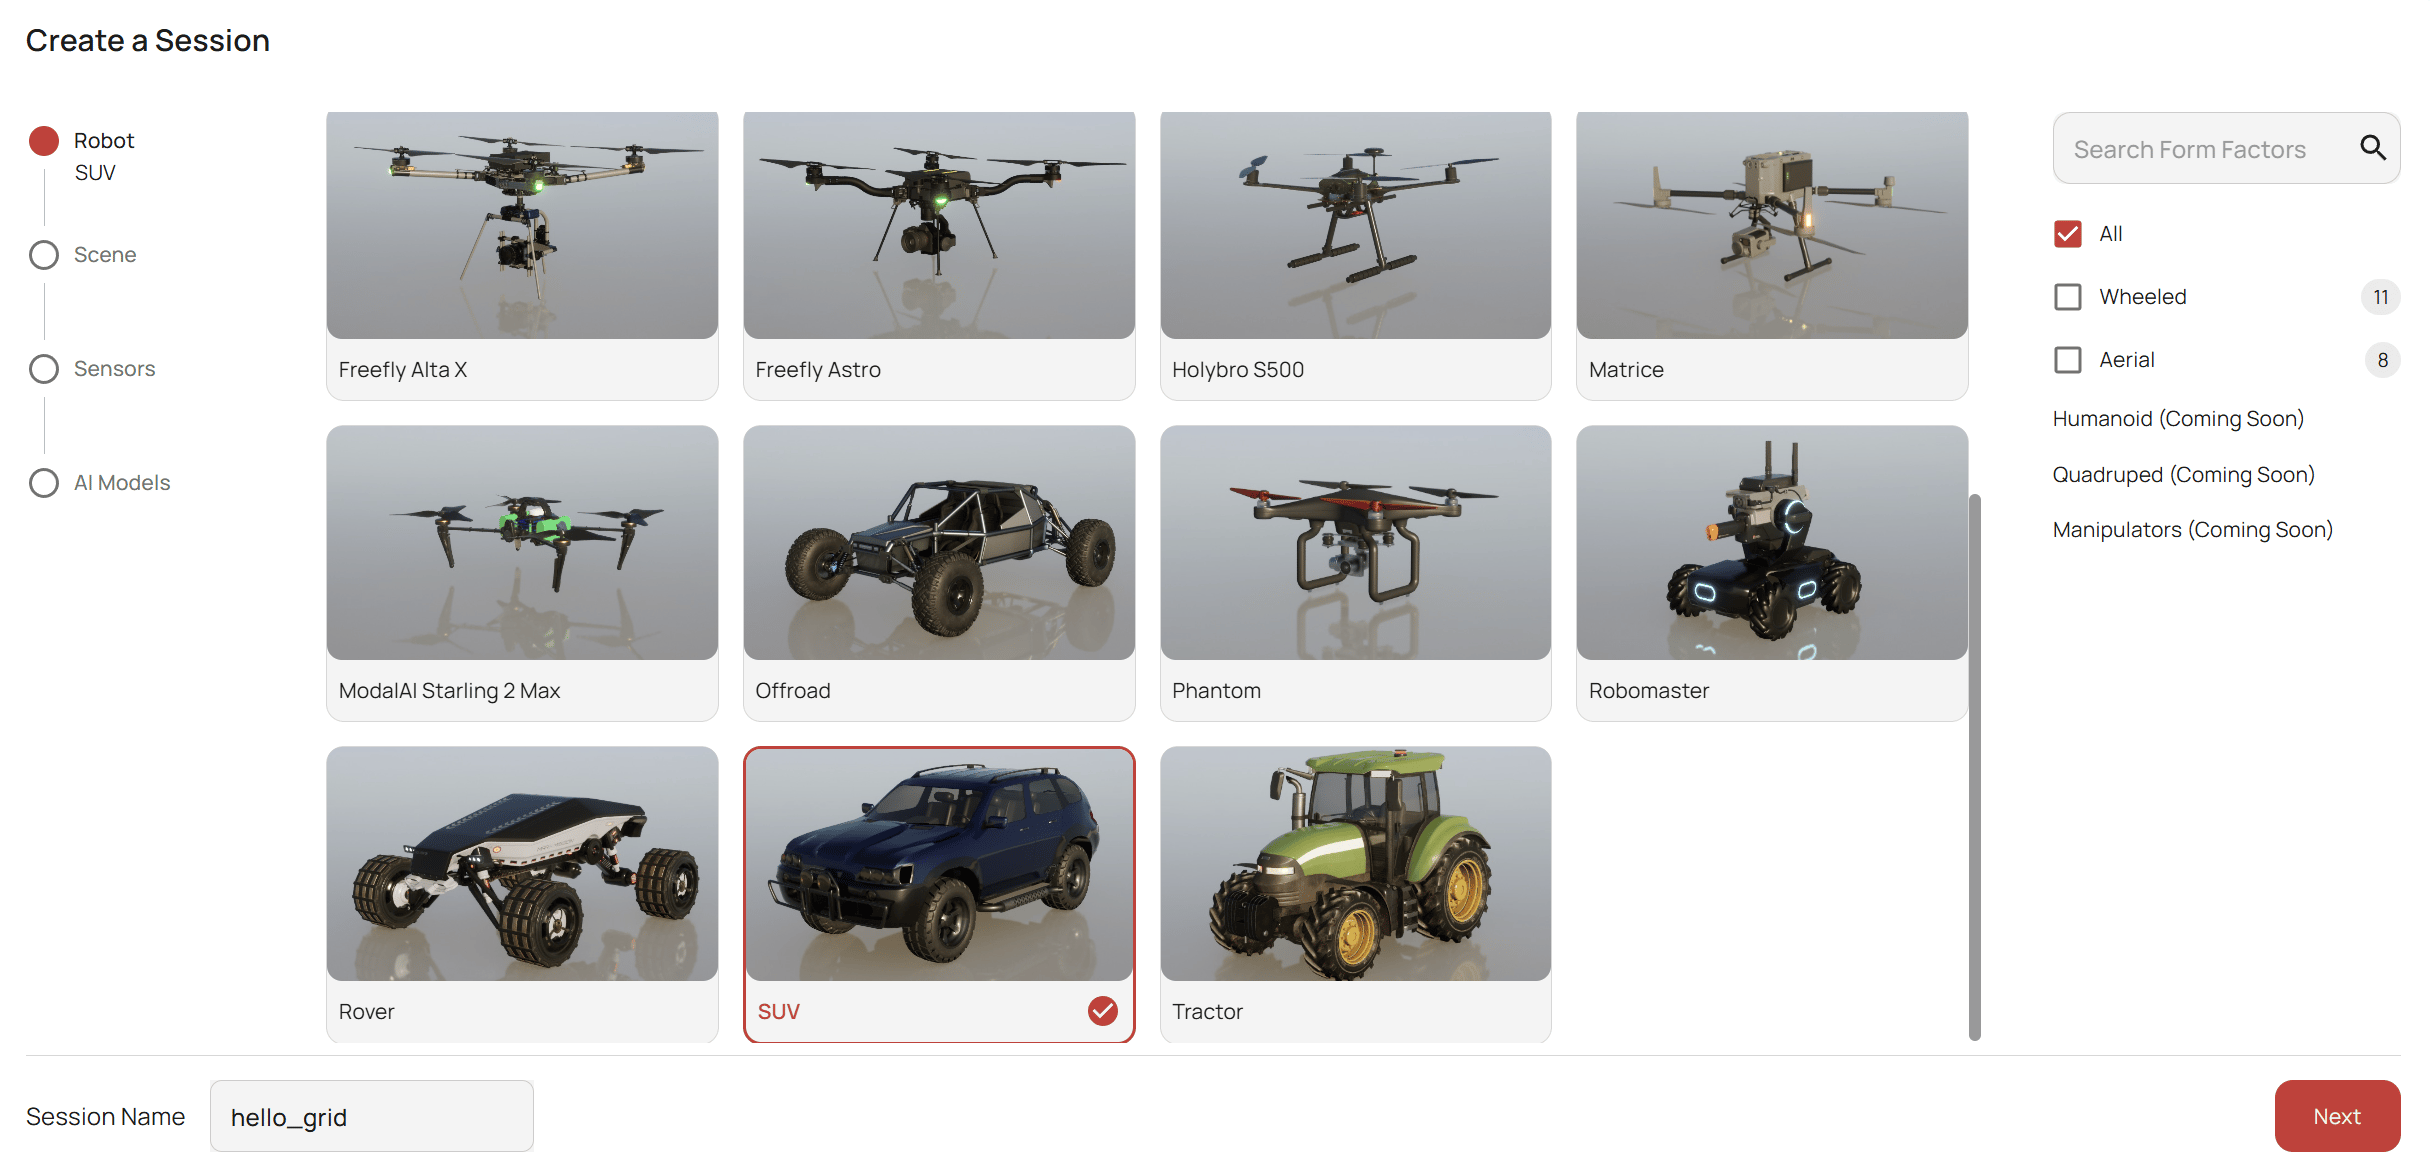
1. **Configure the Robot**\
For this tutorial, we will use an SUV positioned at the origin. You can adjust the vehicle type and starting position according to your needs.
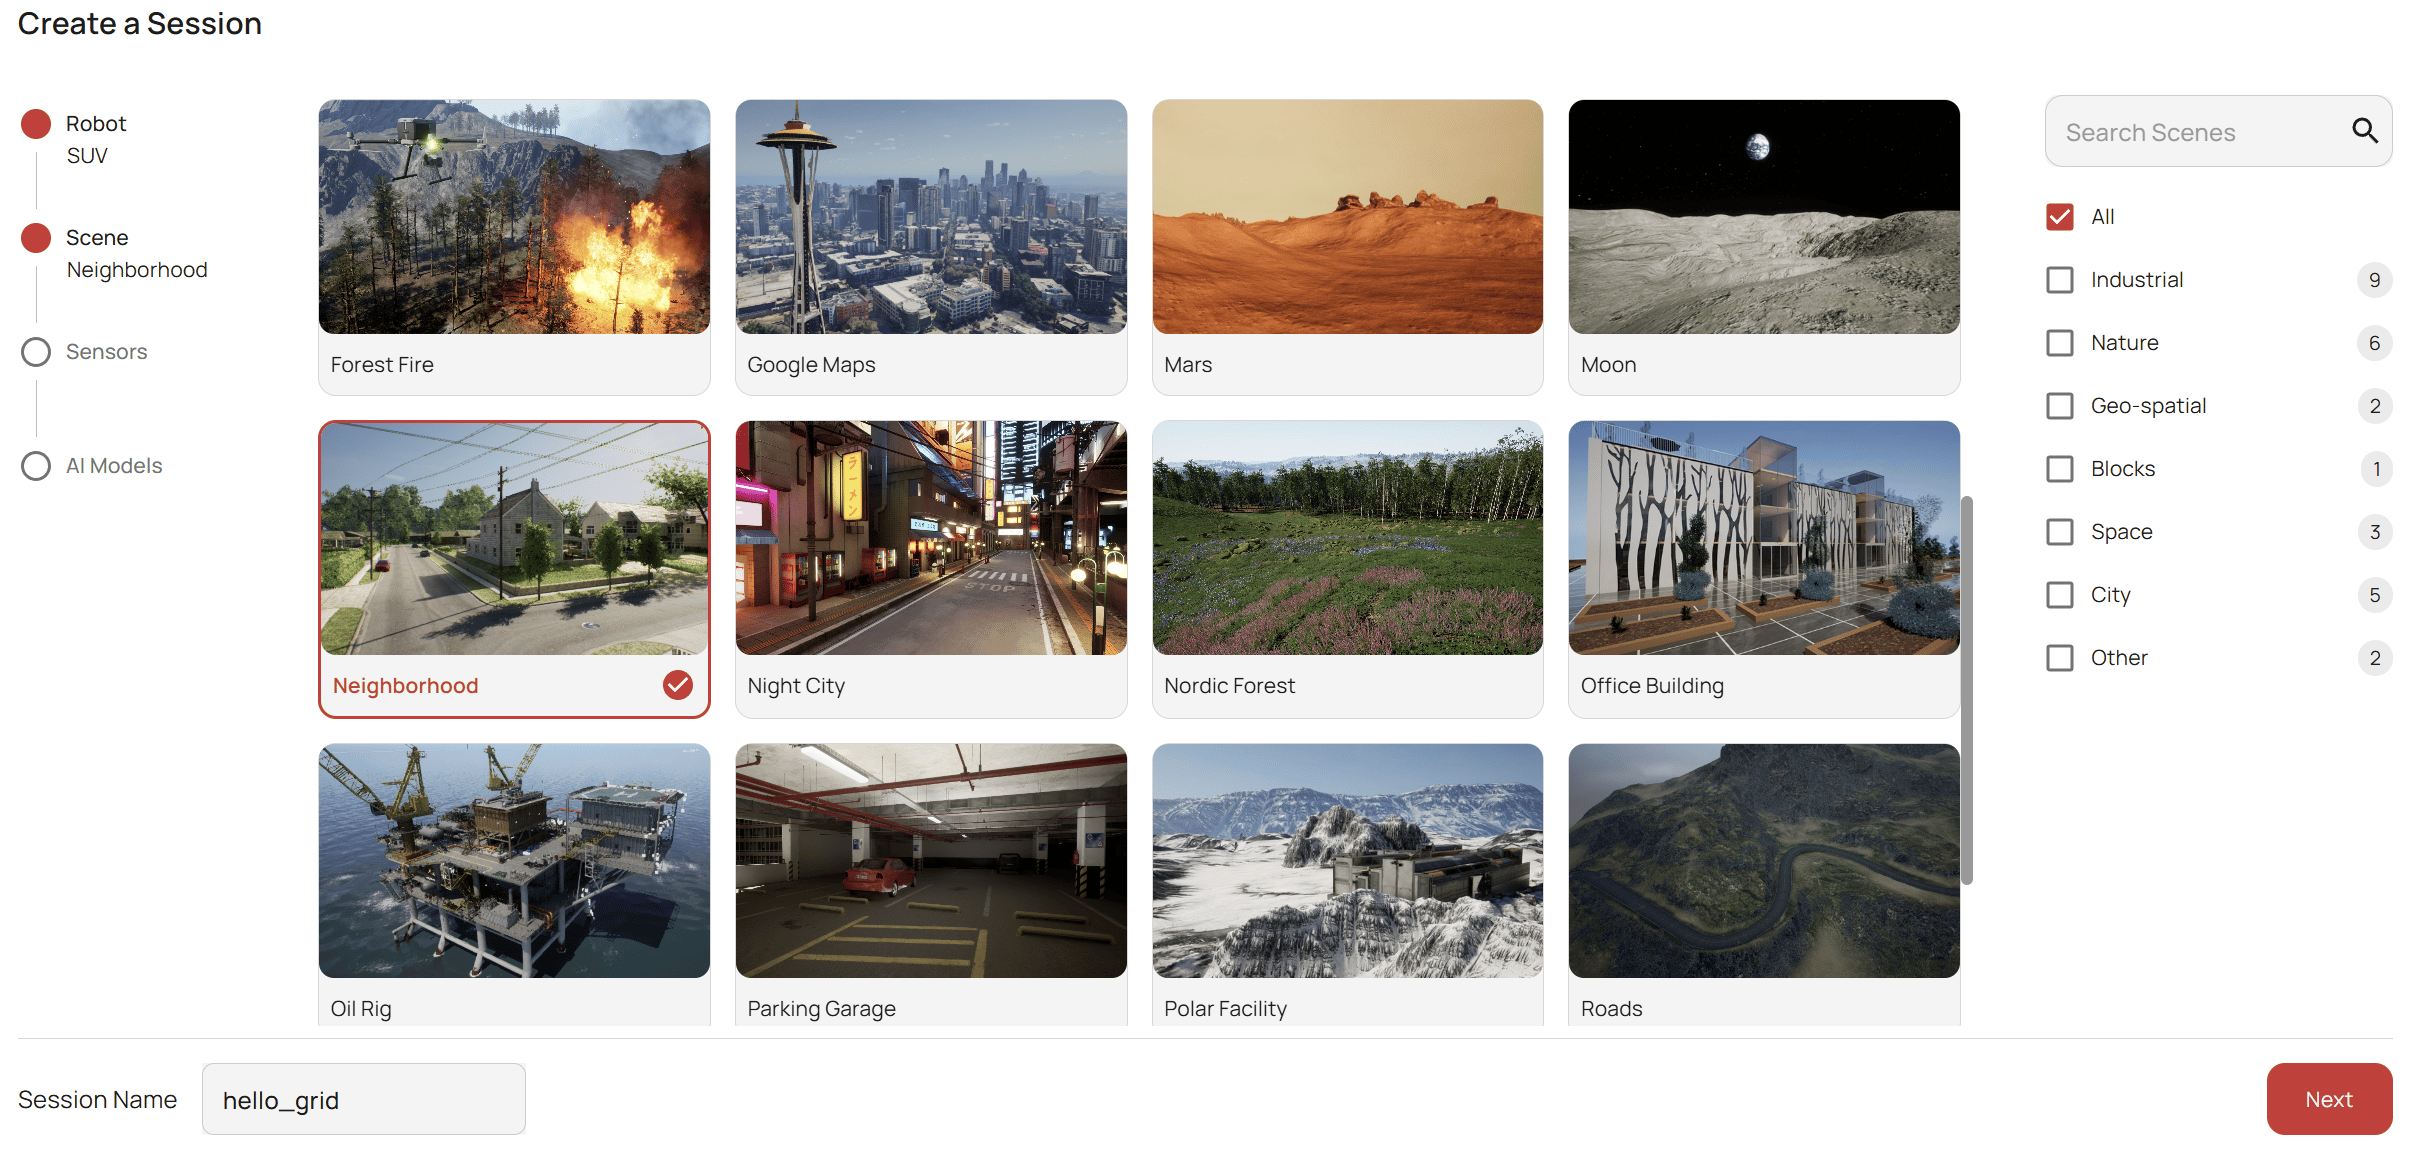
 2. **Name Your Session and Select the Scene**\
Provide a descriptive name for your session and choose the neighbourhood scene from the list of available scenarios.
2. **Name Your Session and Select the Scene**\
Provide a descriptive name for your session and choose the neighbourhood scene from the list of available scenarios.
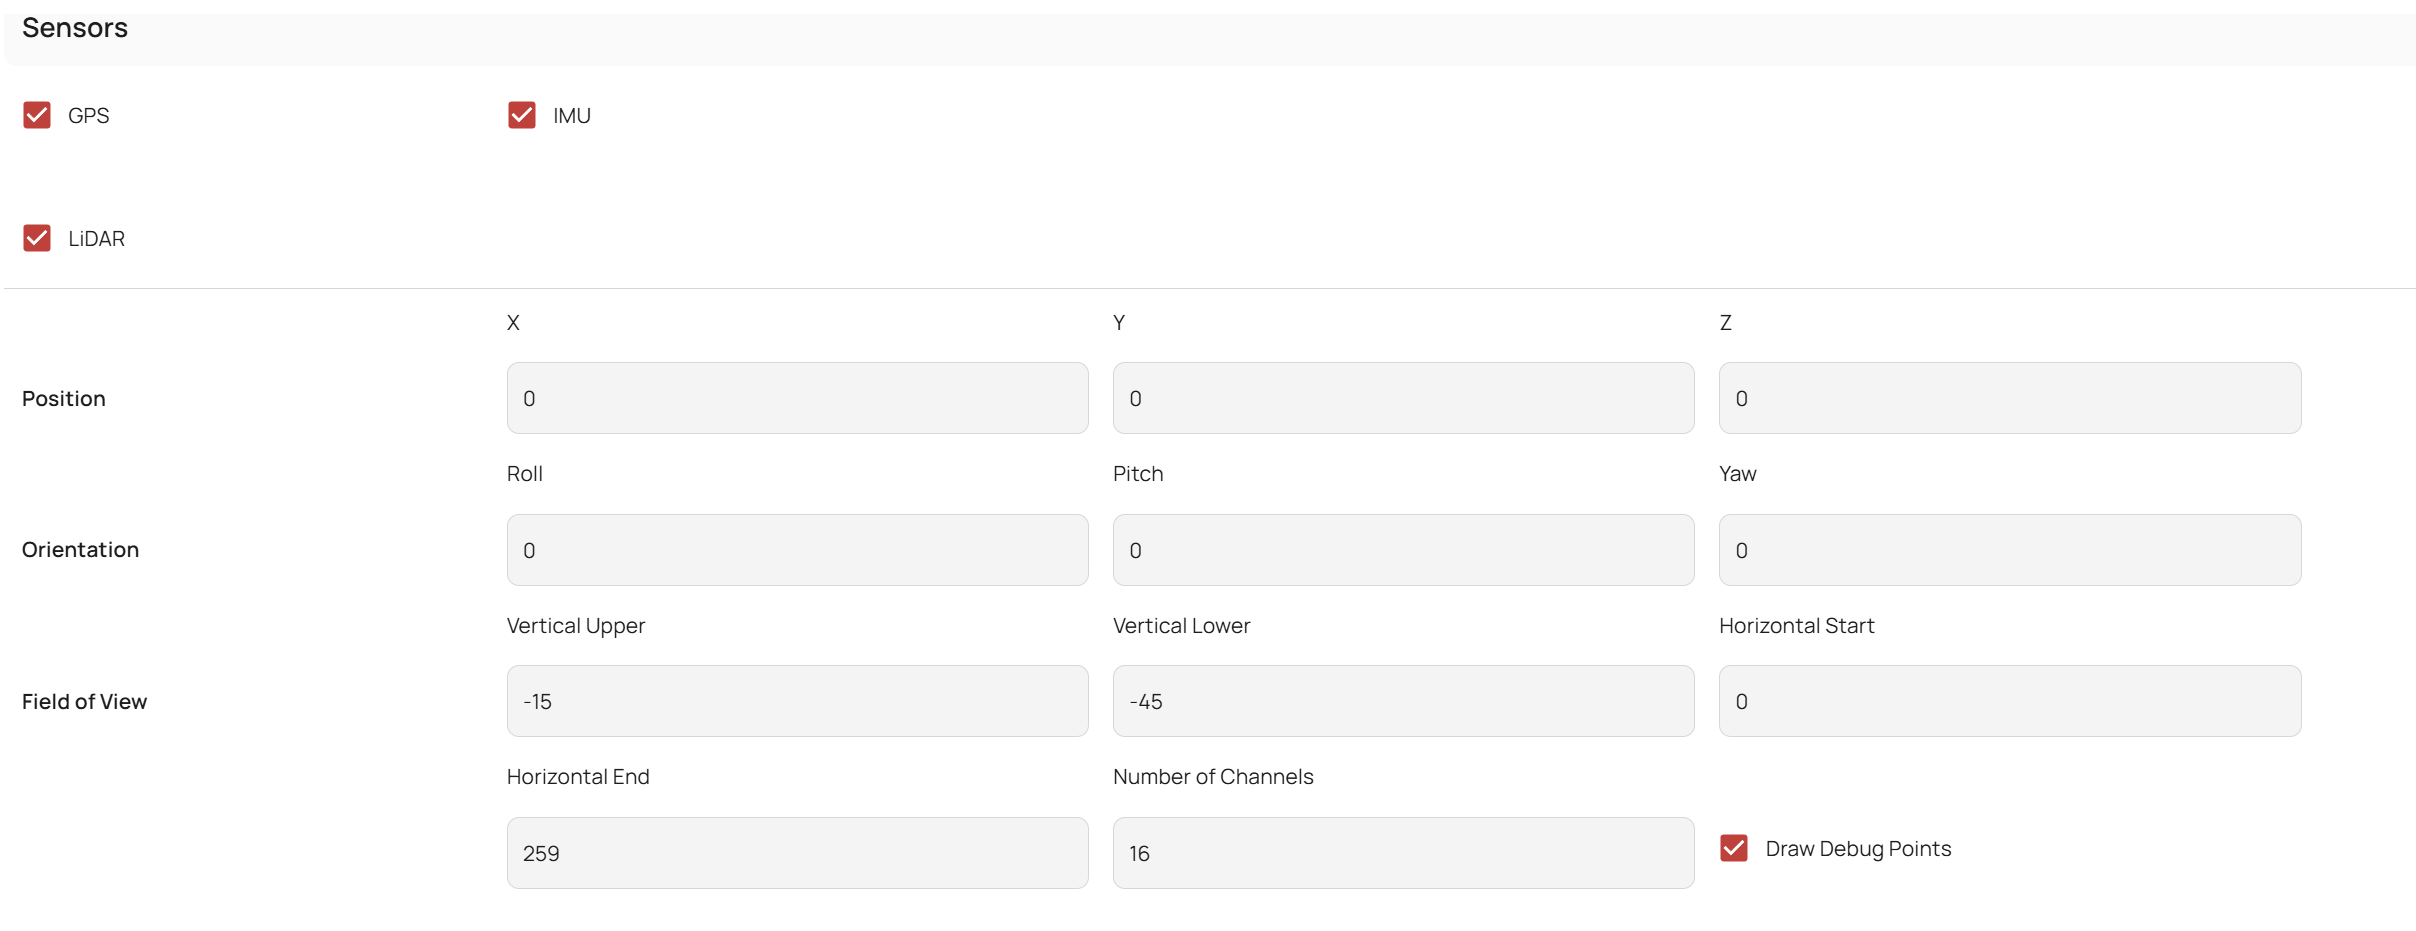
 3. **Configure Sensors**
* **RGB Camera:** Set up an RGB camera with a 512x512 resolution to ensure high-quality images for AI processing.
3. **Configure Sensors**
* **RGB Camera:** Set up an RGB camera with a 512x512 resolution to ensure high-quality images for AI processing.
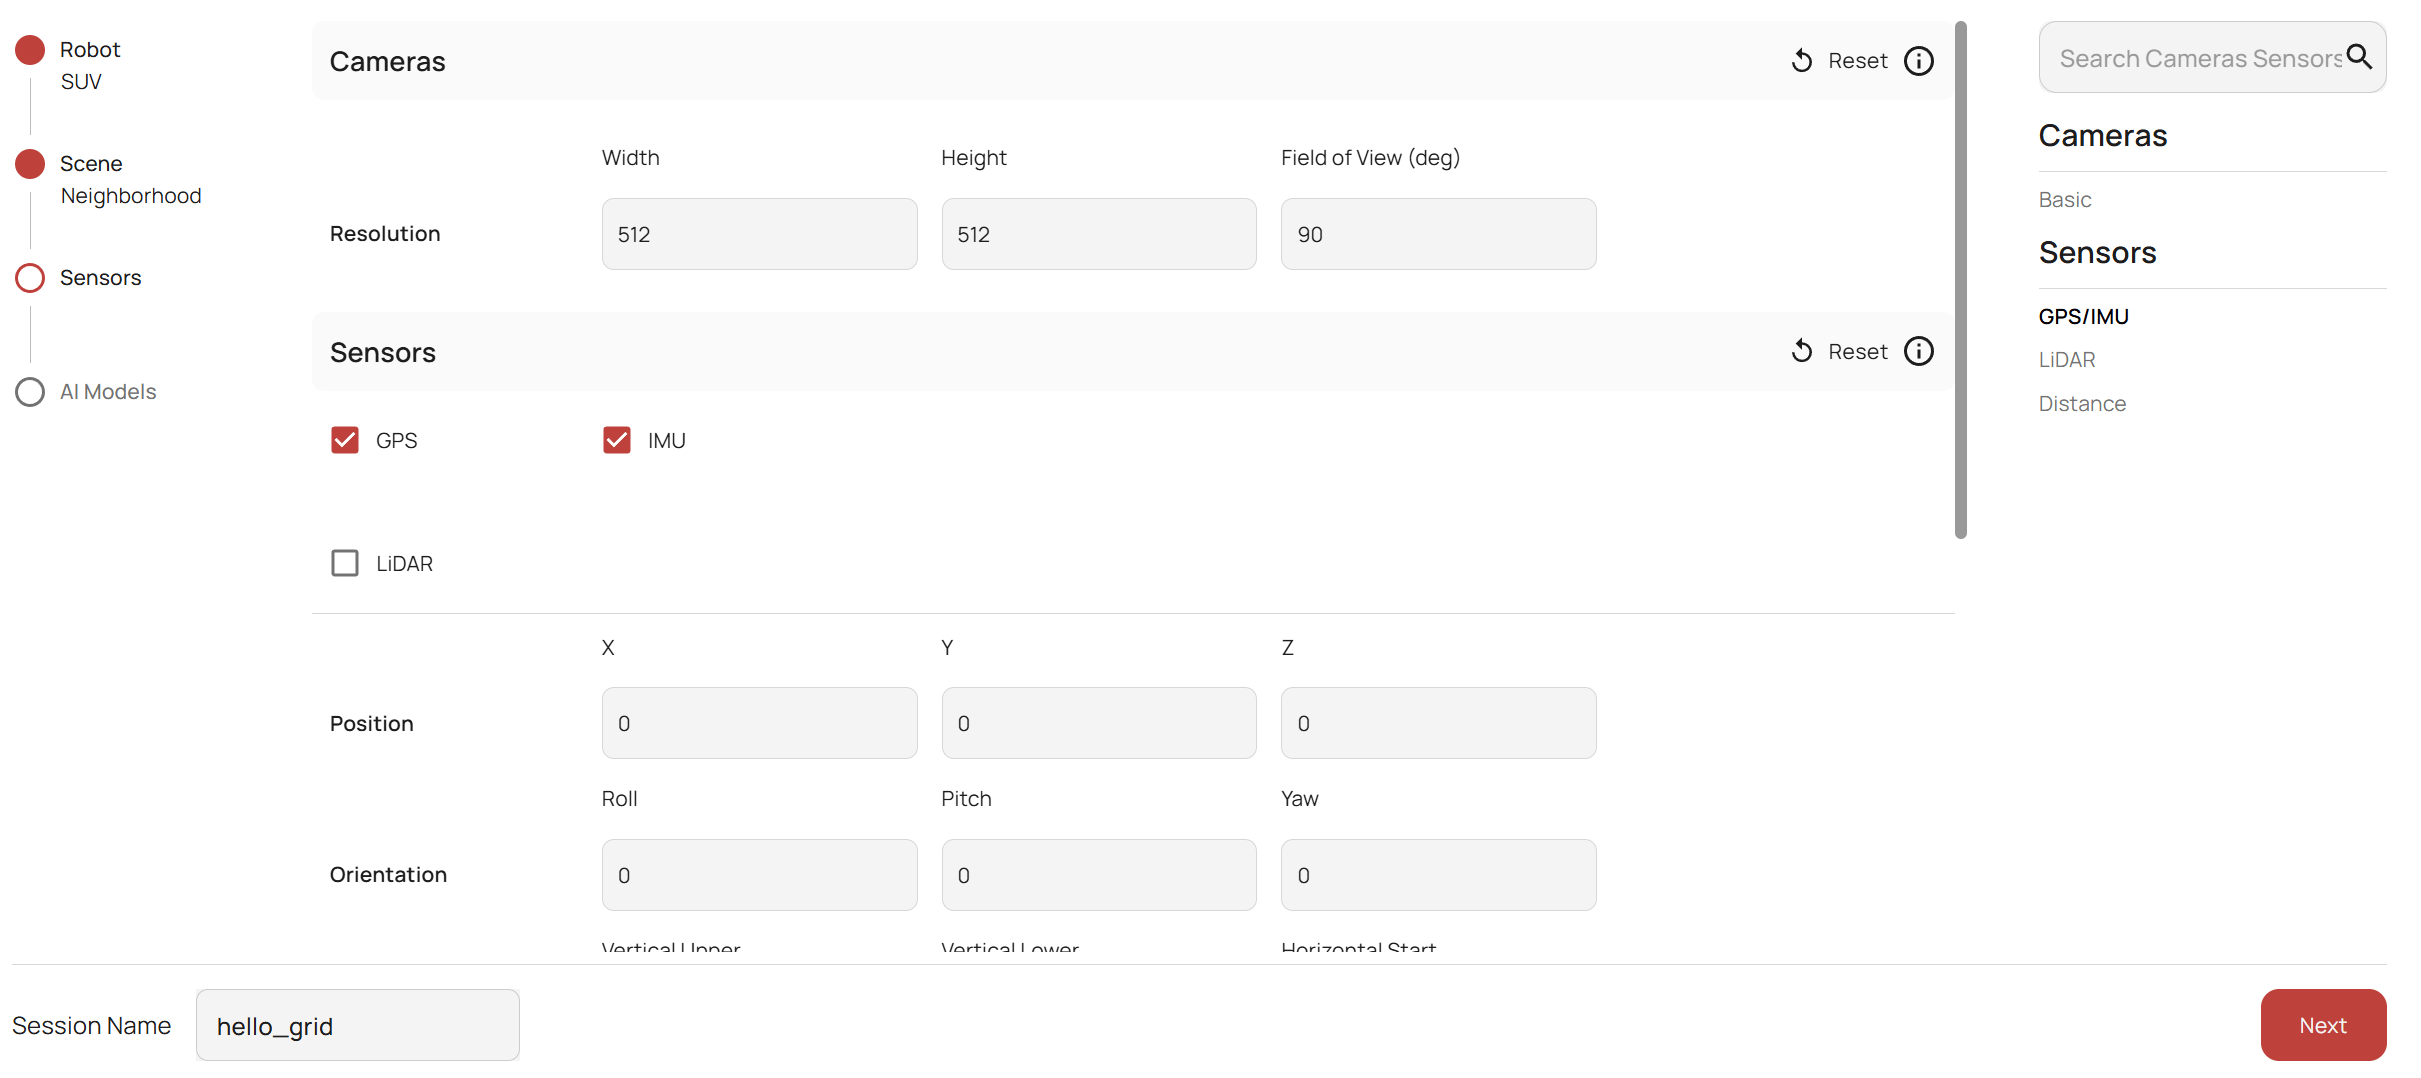 * **LiDAR Sensor:** Add a LiDAR sensor with custom parameters. For more details on sensor configuration options, refer to the [Sensors](/simulation/airgen/features/sensors) tab.
 4. **Select AI Models**\
For this demonstration, we will integrate the [Grounded SAM model](/models/segmentation/gsam) to perform image segmentation tasks.
4. **Select AI Models**\
For this demonstration, we will integrate the [Grounded SAM model](/models/segmentation/gsam) to perform image segmentation tasks.
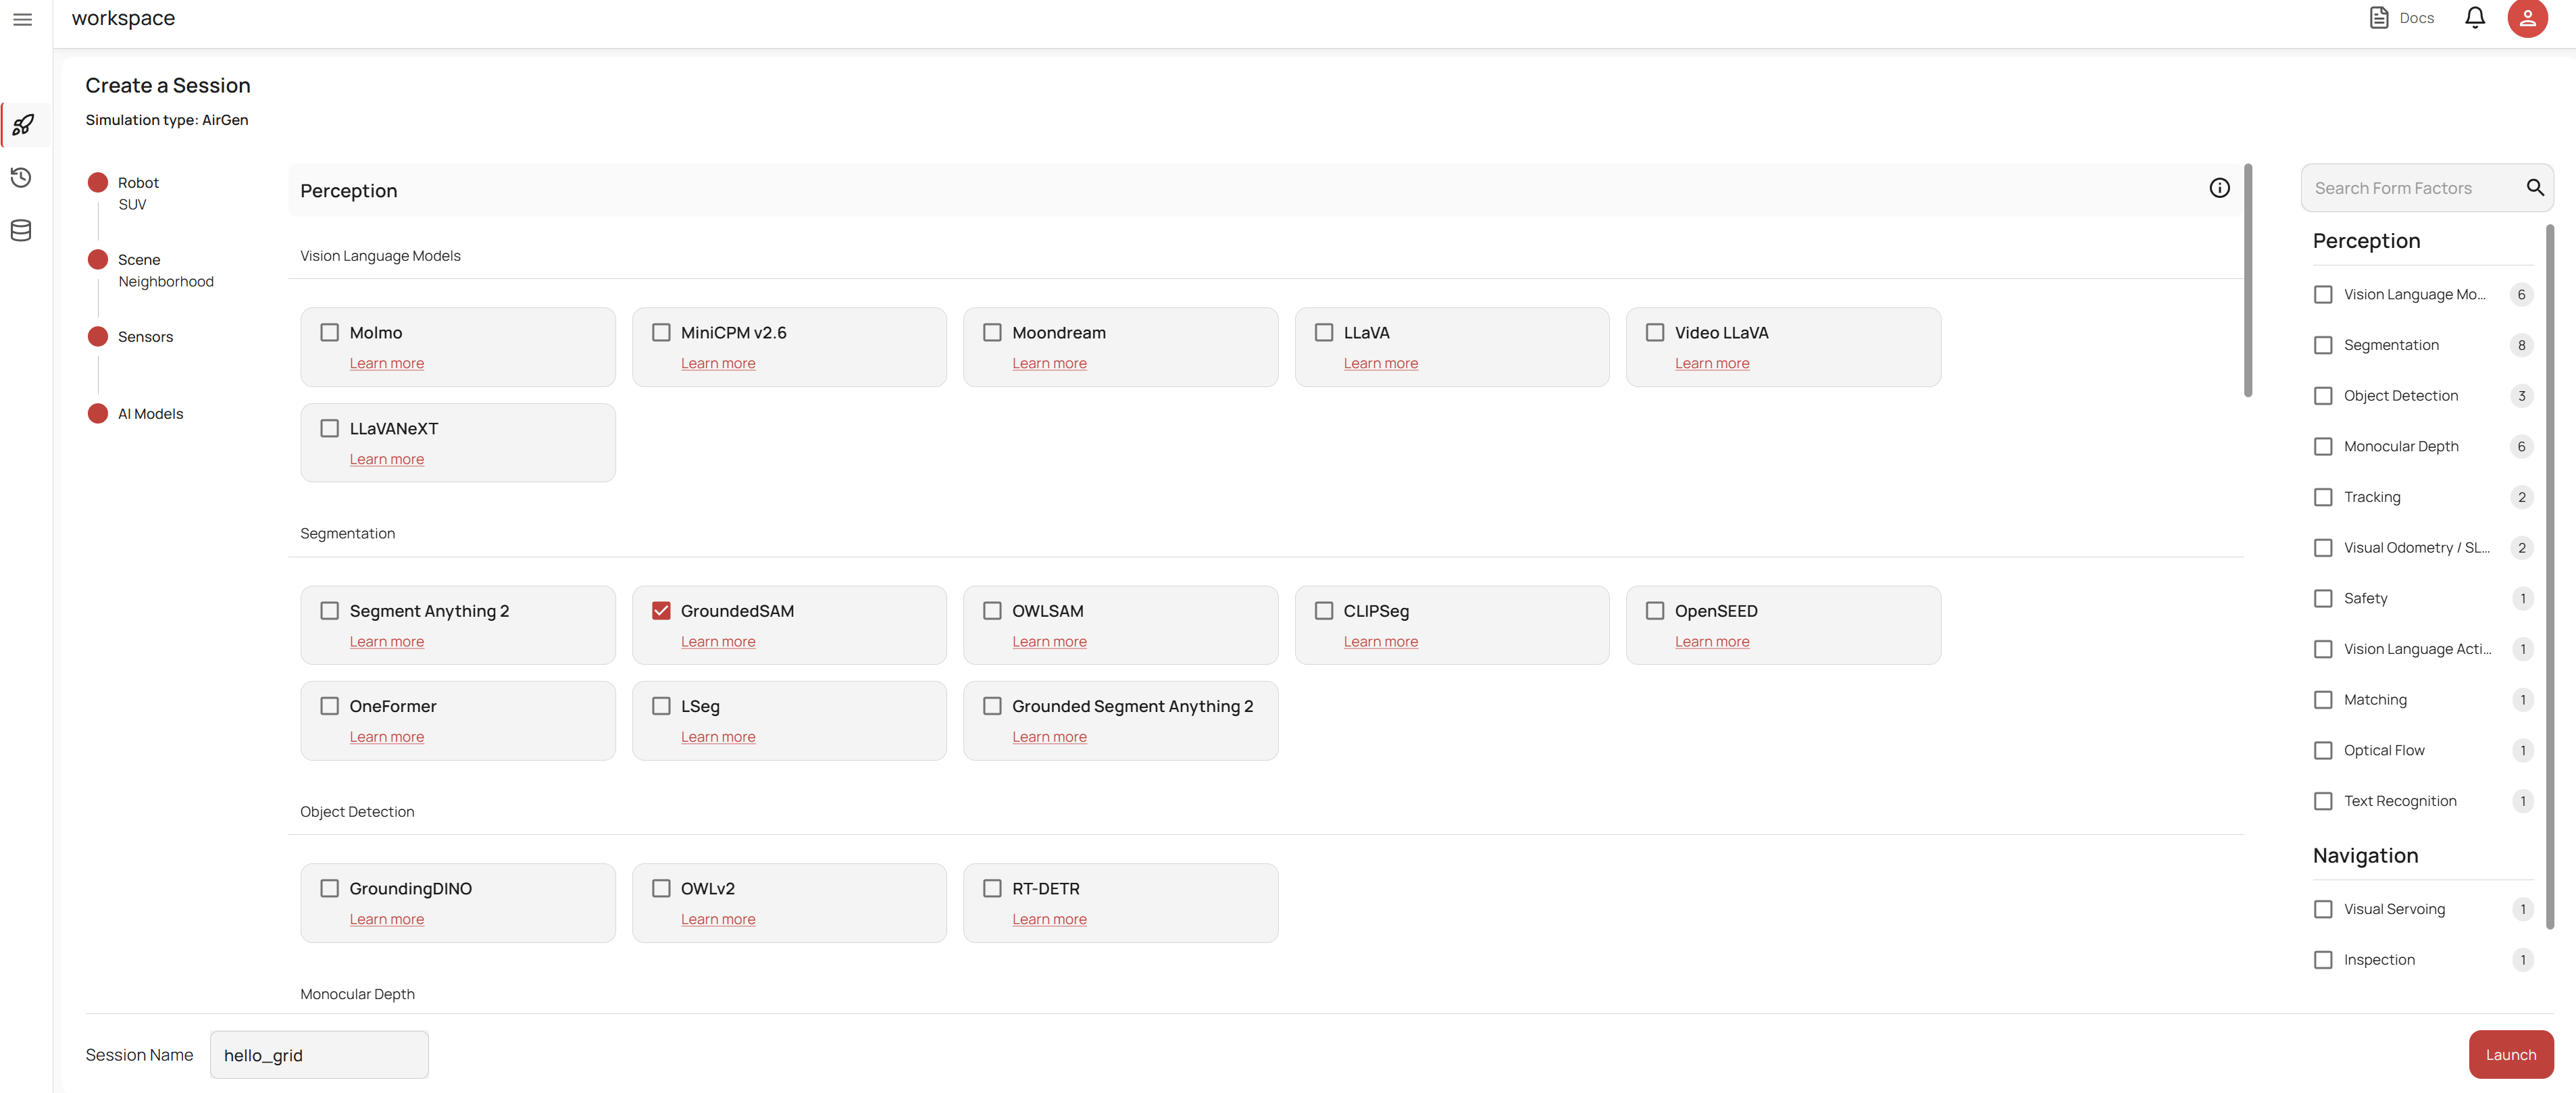 When you are ready, click the **Launch** button to start the simulation.
## Get Started with the GRID Session
Once your simulation is running, you can interact with GRID using the code interface along with the Copilot, Telemetry, and Storage tabs.
All of the code featured in this section is available in a ready-to-run notebook [here](https://github.com/GenRobo/GRID-playground/blob/new/notebooks/hello_grid.ipynb).
### Initial Setup and Control
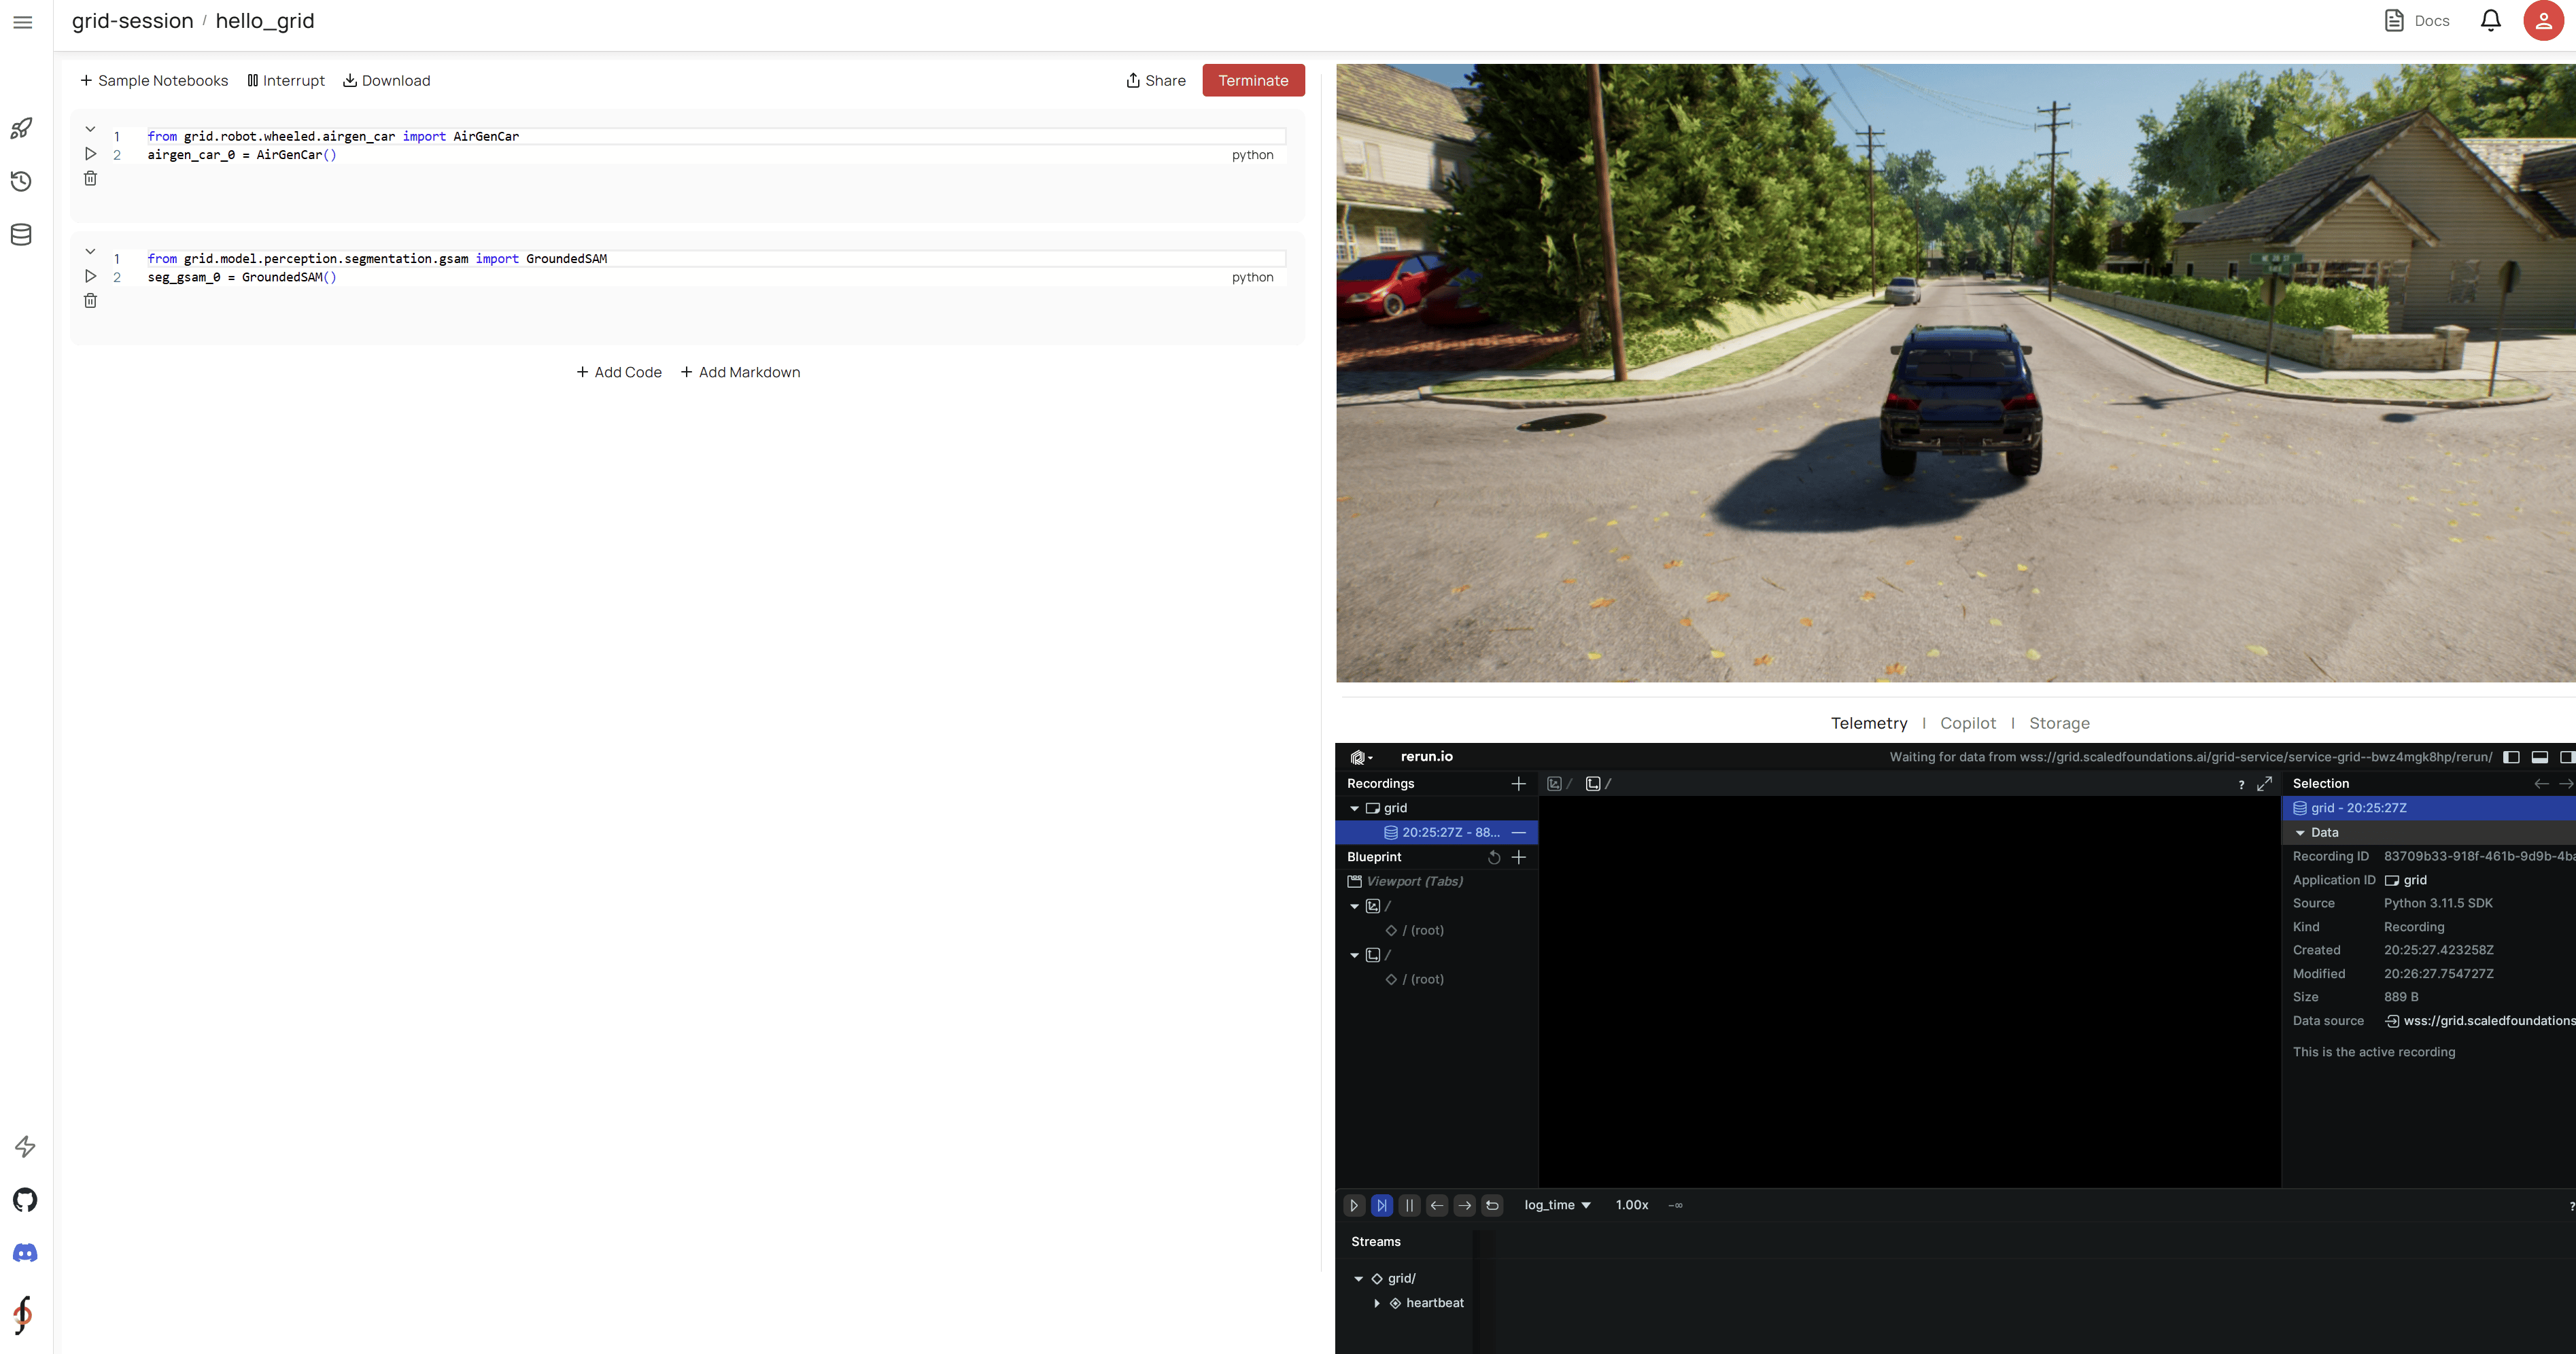
* **Initialize the Environment:**\
Begin by running the boilerplate code to initialize the Airgen API and load the necessary weights for the Grounded SAM model.
When you are ready, click the **Launch** button to start the simulation.
## Get Started with the GRID Session
Once your simulation is running, you can interact with GRID using the code interface along with the Copilot, Telemetry, and Storage tabs.
All of the code featured in this section is available in a ready-to-run notebook [here](https://github.com/GenRobo/GRID-playground/blob/new/notebooks/hello_grid.ipynb).
### Initial Setup and Control
* **Initialize the Environment:**\
Begin by running the boilerplate code to initialize the Airgen API and load the necessary weights for the Grounded SAM model.
 * **Control the Vehicle:**\
Use the `setCarTargetSpeed()` API ([CarClient documentation](/simulation/airgen/reference/car-client)) to move the car forward, and then capture images using the `getImages()` API. The following code block demonstrates how to position the car and capture an image:
* **Control the Vehicle:**\
Use the `setCarTargetSpeed()` API ([CarClient documentation](/simulation/airgen/reference/car-client)) to move the car forward, and then capture images using the `getImages()` API. The following code block demonstrates how to position the car and capture an image:
 We are using the "front\_center" camera in this example because the road is directly ahead. For a list of default cameras and their positions, refer to the [Cameras](/simulation/airgen/features/camera) tab.
### Image Segmentation with Grounded SAM
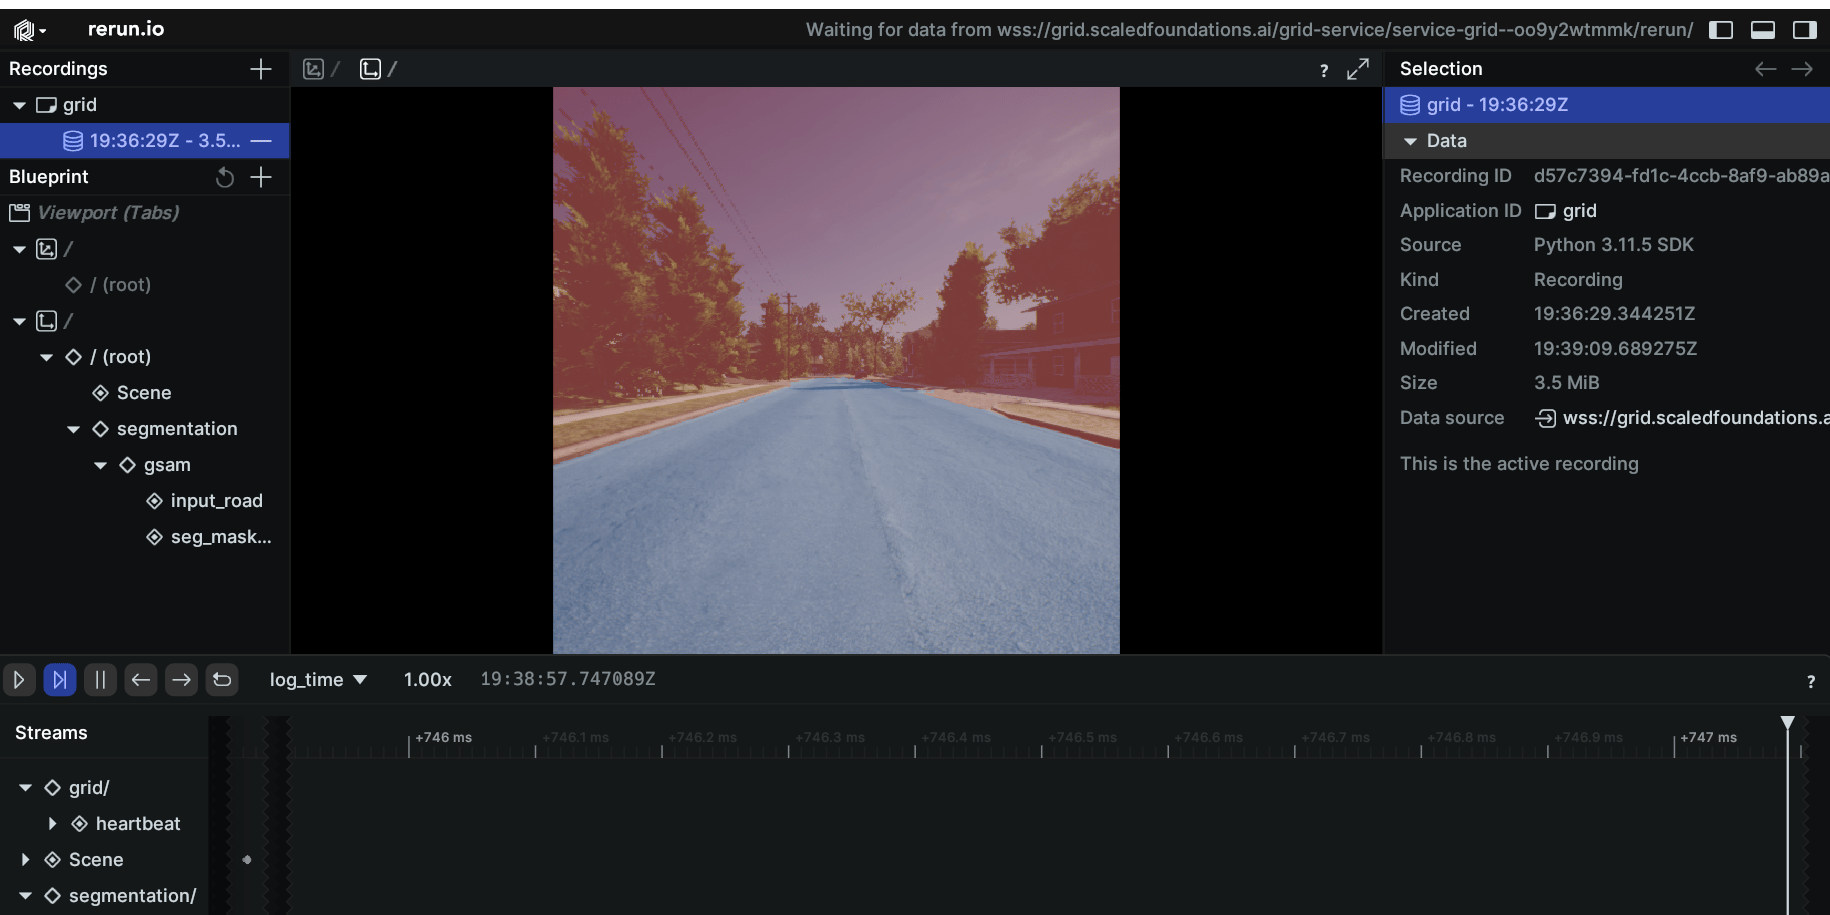
* **Segment the Road:**\
Apply the [Grounded SAM model](/models/segmentation/gsam) to segment the road in the image you just captured. Visualize the output using the rerun module.
We will be running the below code to segment the road:
```Python
road = seg_gsam_0.run(image[0][0], "road")
```
We are using the "front\_center" camera in this example because the road is directly ahead. For a list of default cameras and their positions, refer to the [Cameras](/simulation/airgen/features/camera) tab.
### Image Segmentation with Grounded SAM
* **Segment the Road:**\
Apply the [Grounded SAM model](/models/segmentation/gsam) to segment the road in the image you just captured. Visualize the output using the rerun module.
We will be running the below code to segment the road:
```Python
road = seg_gsam_0.run(image[0][0], "road")
```
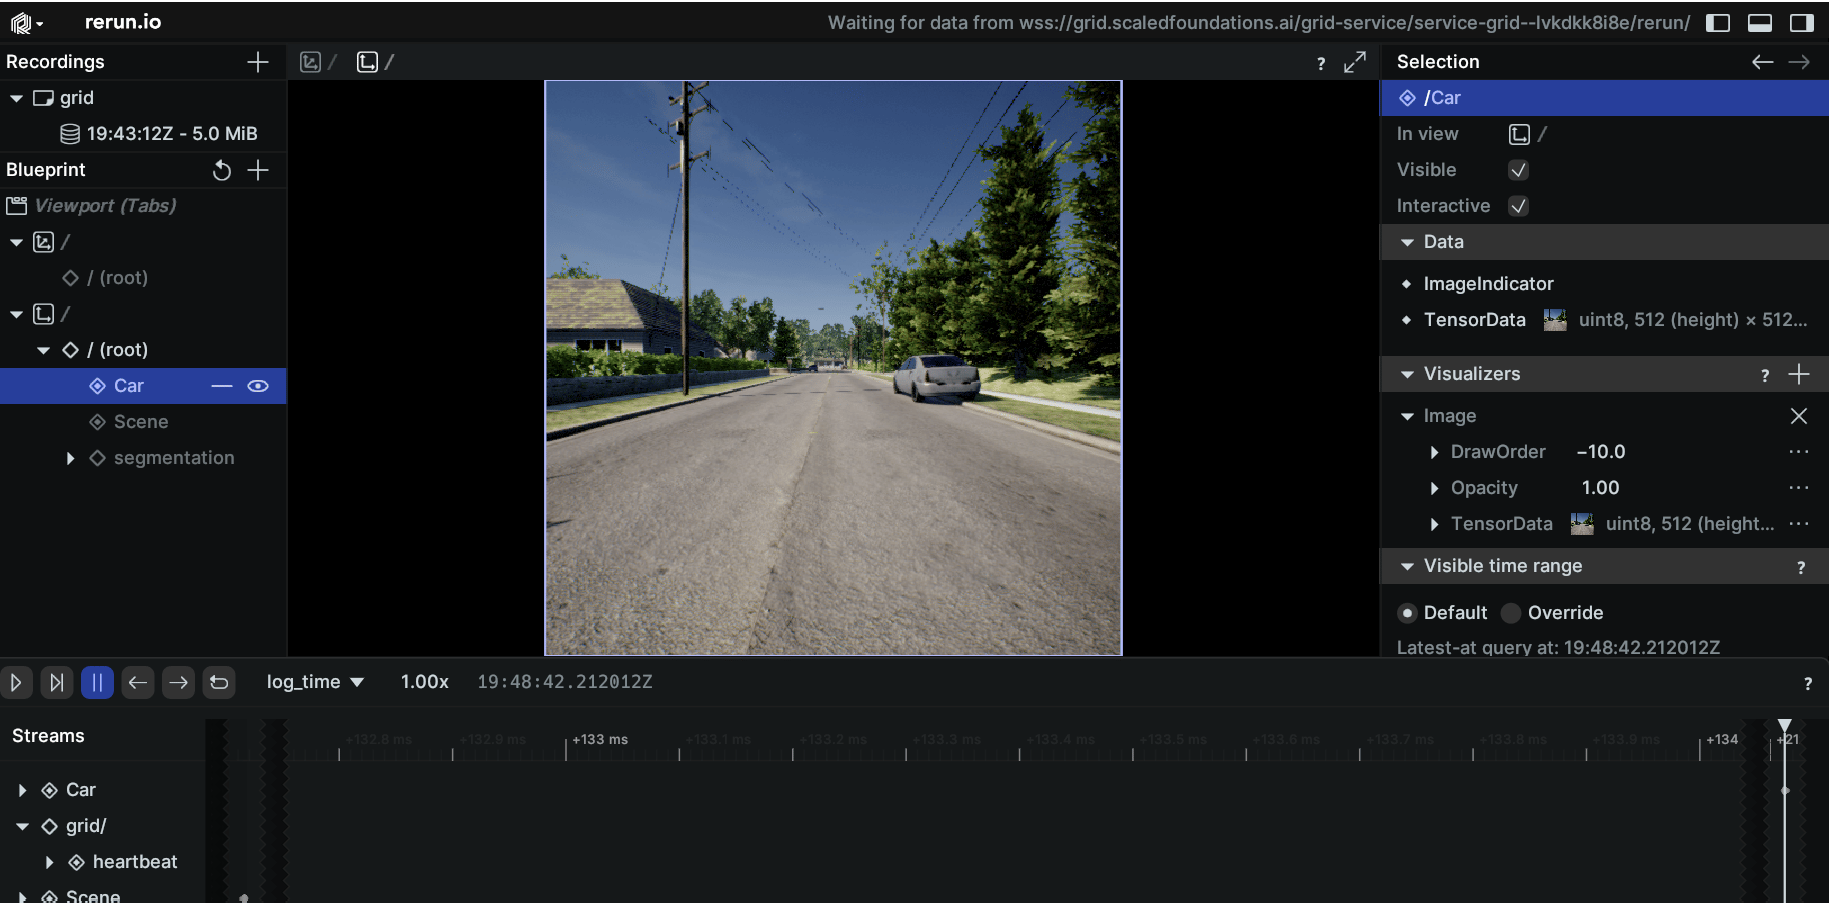
 * **Alternate Camera View:**\
Try capturing and segmenting an image from the "back\_center" camera for a different perspective.
The following code block captures an image from the back camera:
```Python
image_new = client.getImages("back_center", [0])
rr.log("Car", rr.Image(image_new[0][0]))
```
* **Alternate Camera View:**\
Try capturing and segmenting an image from the "back\_center" camera for a different perspective.
The following code block captures an image from the back camera:
```Python
image_new = client.getImages("back_center", [0])
rr.log("Car", rr.Image(image_new[0][0]))
```
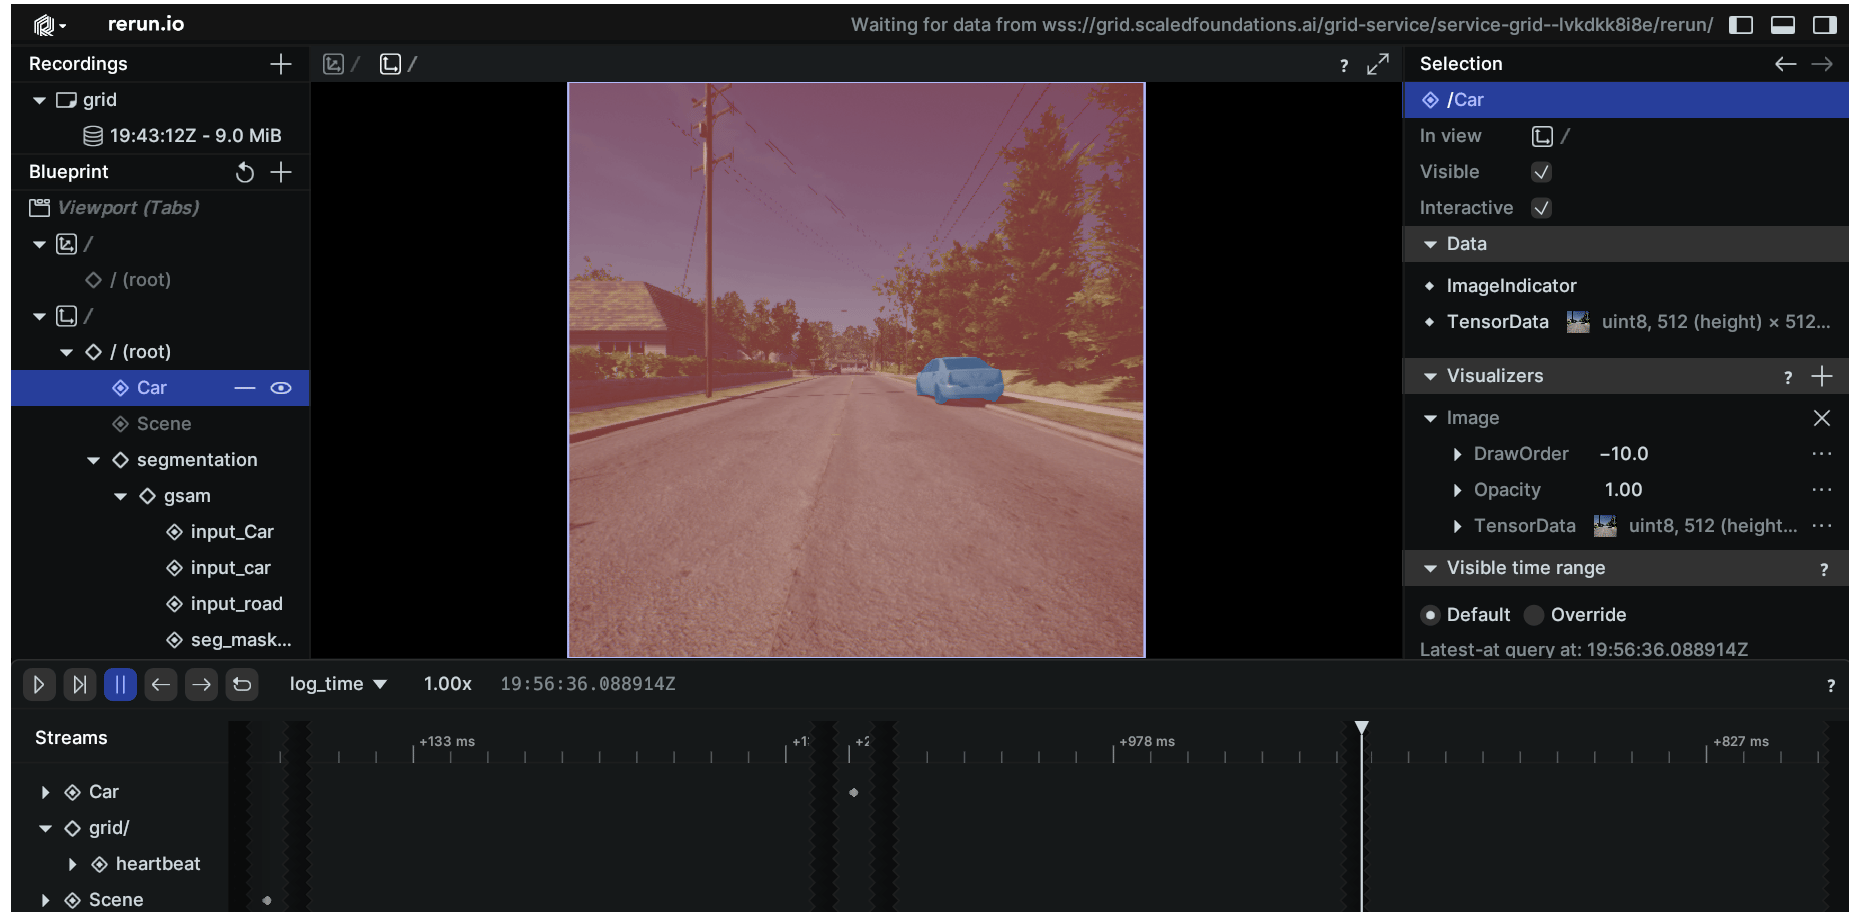
 Let us now segment the image captured from the back camera:
```Python
car = seg_gsam_0.run(image_new[0][0], "car")
```
Let us now segment the image captured from the back camera:
```Python
car = seg_gsam_0.run(image_new[0][0], "car")
```
 ### Navigating the Scene
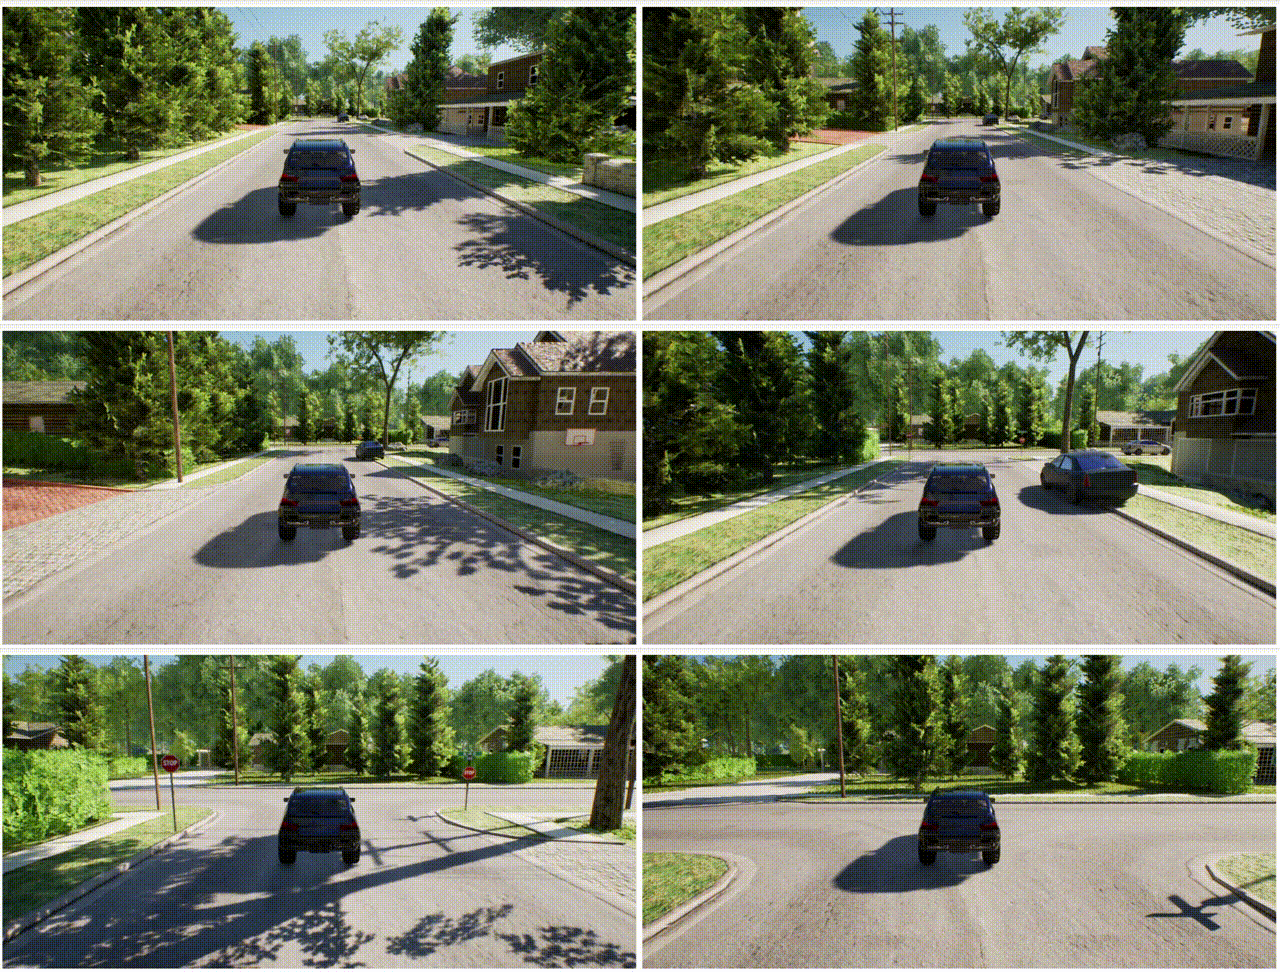
* **Move to a Specific Position:**\
Advance the car to the position **x = -120 metres** using the following code block:
```Python
client.setCarTargetSpeed(5)
while True:
if client.simGetVehiclePose().position.x_val <= -120:
client.setCarTargetSpeed(0)
break
print(client.simGetVehiclePose().position)
```
### Navigating the Scene
* **Move to a Specific Position:**\
Advance the car to the position **x = -120 metres** using the following code block:
```Python
client.setCarTargetSpeed(5)
while True:
if client.simGetVehiclePose().position.x_val <= -120:
client.setCarTargetSpeed(0)
break
print(client.simGetVehiclePose().position)
```
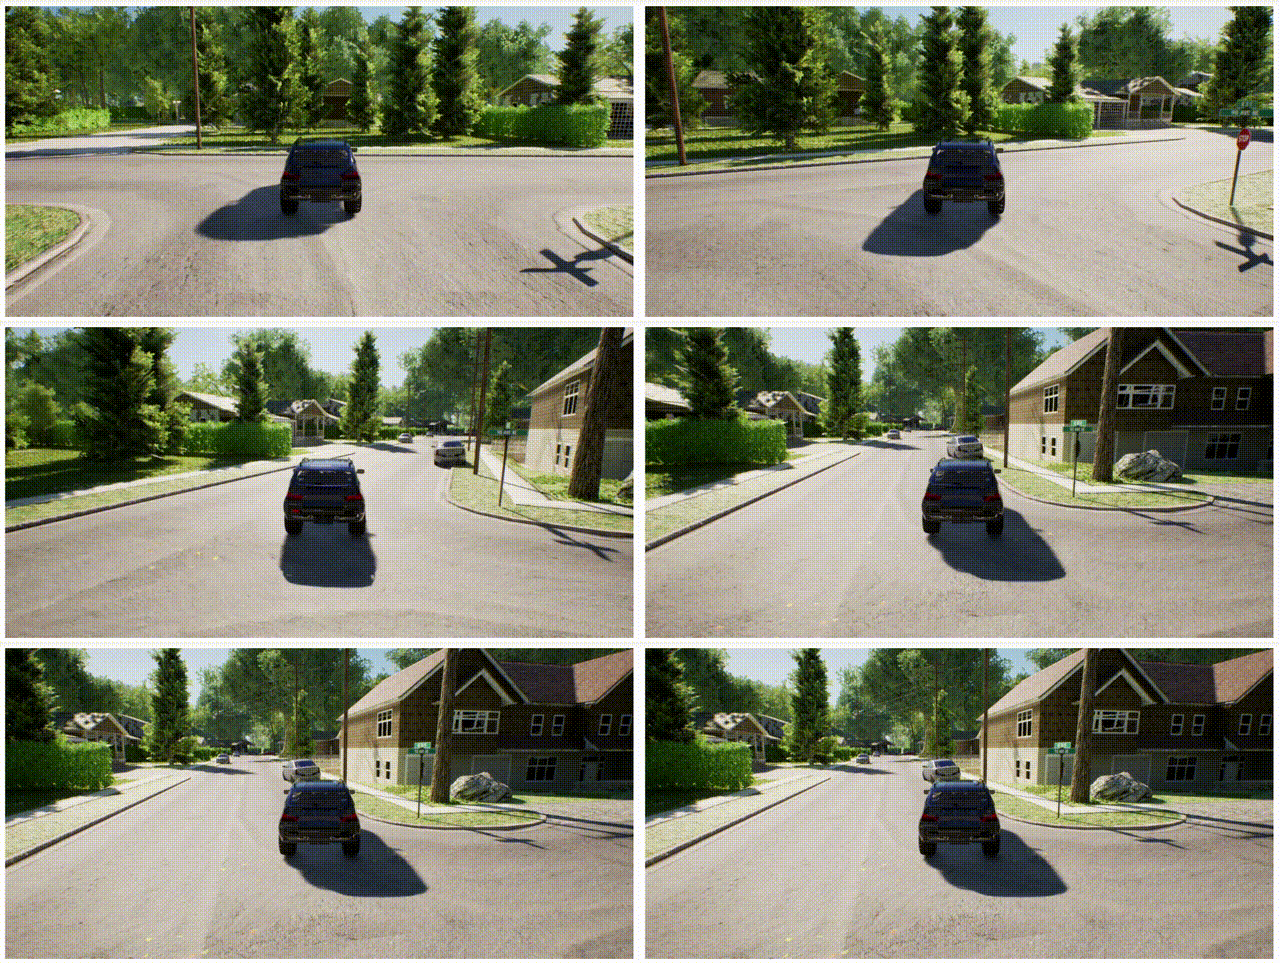
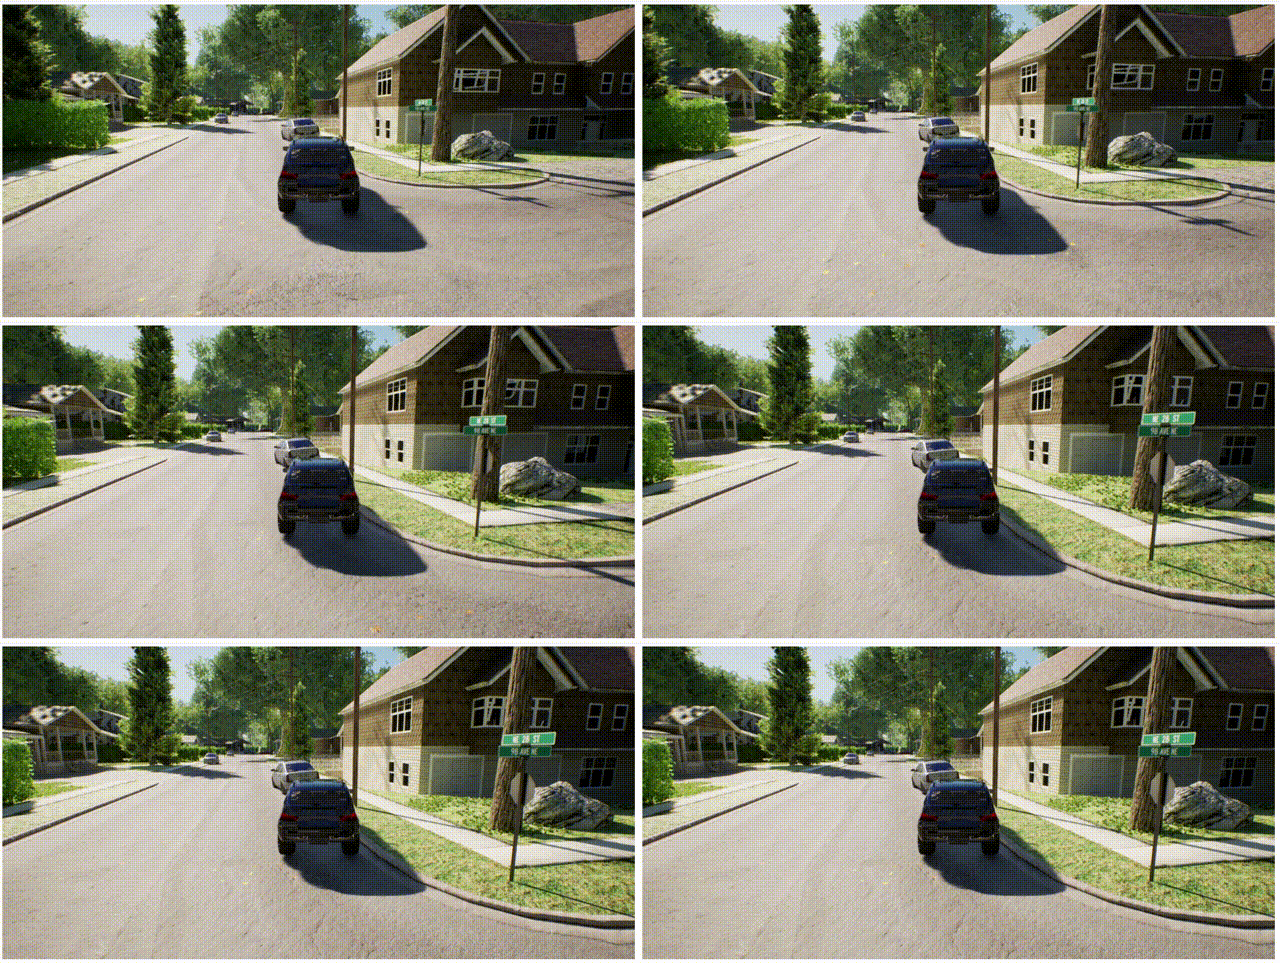
 * **Perform a Right Turn:**\
To execute a right turn, set the steering to `1.0` for a sharp turn, then move the car slowly to complete the maneuver.
```Python
controls = client.getCarControls()
controls.is_manual_gear = False
controls.steering = 1.0
client.setCarControls(controls)
client.setCarTargetSpeed(2.1)
time.sleep(3)
client.setCarTargetSpeed(0)
```
* **Perform a Right Turn:**\
To execute a right turn, set the steering to `1.0` for a sharp turn, then move the car slowly to complete the maneuver.
```Python
controls = client.getCarControls()
controls.is_manual_gear = False
controls.steering = 1.0
client.setCarControls(controls)
client.setCarTargetSpeed(2.1)
time.sleep(3)
client.setCarTargetSpeed(0)
```
 * **Return to Straight Movement:**\
Reset the steering to `0.0` to resume straight-line motion.
```Python
controls.steering = 0.0
client.setCarControls(controls)
client.setCarTargetSpeed(2)
time.sleep(3)
client.setCarTargetSpeed(0)
```
* **Return to Straight Movement:**\
Reset the steering to `0.0` to resume straight-line motion.
```Python
controls.steering = 0.0
client.setCarControls(controls)
client.setCarTargetSpeed(2)
time.sleep(3)
client.setCarTargetSpeed(0)
```
 ### Working with LiDAR Data
* **Generate a Point Cloud:**\
Utilize the `getLidardata()` API ([LiDAR documentation](/simulation/airgen/features/sensors#lidar)) to capture LiDAR data. The code snippet below shows how to transform the raw data into a list of points with the appropriate coordinate transformations.
```Python
def get_lidar_data(client):
lidar_data = client.getLidarData()
if len(lidar_data.point_cloud) < 3:
print("No points received from Lidar")
else:
points = np.array(lidar_data.point_cloud, dtype=np.float32)
points = np.reshape(points, (int(points.shape[0] / 3), 3))
points_xyz = np.zeros_like(points)
points_xyz[:, 0] = points[:, 0]
points_xyz[:, 1] = points[:, 1]
points_xyz[:, 2] = -points[:, 2] + 1
print("Got LiDAR Data")
return points_xyz
```
* **Visualize the Point Cloud:**\
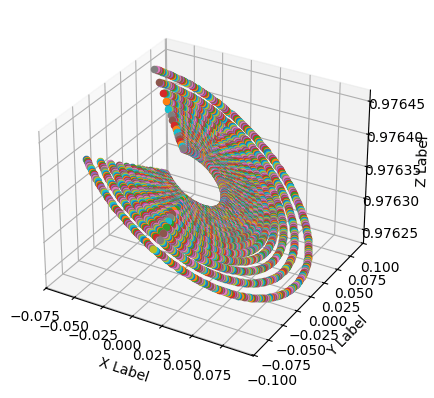
With Matplotlib, scatter the LiDAR point cloud data and save the plot as an image. You can locate the session's directory via the **GRID\_USER\_SESSION\_BLOB\_DIR** variable. Below is how you're storage tab would look like after you save the LiDAR data.
```Python
%matplotlib inline
import os
from grid import GRID_USER_SESSION_BLOB_DIR
import numpy as np
import matplotlib.pyplot as plt
points = get_lidar_data(client)
fig = plt.figure()
ax = fig.add_subplot(projection='3d')
for point in points:
ax.scatter(point[0], point[1], point[2])
ax.set_xlabel('X Label')
ax.set_ylabel('Y Label')
ax.set_zlabel('Z Label')
save_path = os.path.join(GRID_USER_SESSION_BLOB_DIR, "pcl.png")
plt.savefig(save_path, bbox_inches='tight')
print("Saved!")
```
### Working with LiDAR Data
* **Generate a Point Cloud:**\
Utilize the `getLidardata()` API ([LiDAR documentation](/simulation/airgen/features/sensors#lidar)) to capture LiDAR data. The code snippet below shows how to transform the raw data into a list of points with the appropriate coordinate transformations.
```Python
def get_lidar_data(client):
lidar_data = client.getLidarData()
if len(lidar_data.point_cloud) < 3:
print("No points received from Lidar")
else:
points = np.array(lidar_data.point_cloud, dtype=np.float32)
points = np.reshape(points, (int(points.shape[0] / 3), 3))
points_xyz = np.zeros_like(points)
points_xyz[:, 0] = points[:, 0]
points_xyz[:, 1] = points[:, 1]
points_xyz[:, 2] = -points[:, 2] + 1
print("Got LiDAR Data")
return points_xyz
```
* **Visualize the Point Cloud:**\
With Matplotlib, scatter the LiDAR point cloud data and save the plot as an image. You can locate the session's directory via the **GRID\_USER\_SESSION\_BLOB\_DIR** variable. Below is how you're storage tab would look like after you save the LiDAR data.
```Python
%matplotlib inline
import os
from grid import GRID_USER_SESSION_BLOB_DIR
import numpy as np
import matplotlib.pyplot as plt
points = get_lidar_data(client)
fig = plt.figure()
ax = fig.add_subplot(projection='3d')
for point in points:
ax.scatter(point[0], point[1], point[2])
ax.set_xlabel('X Label')
ax.set_ylabel('Y Label')
ax.set_zlabel('Z Label')
save_path = os.path.join(GRID_USER_SESSION_BLOB_DIR, "pcl.png")
plt.savefig(save_path, bbox_inches='tight')
print("Saved!")
```
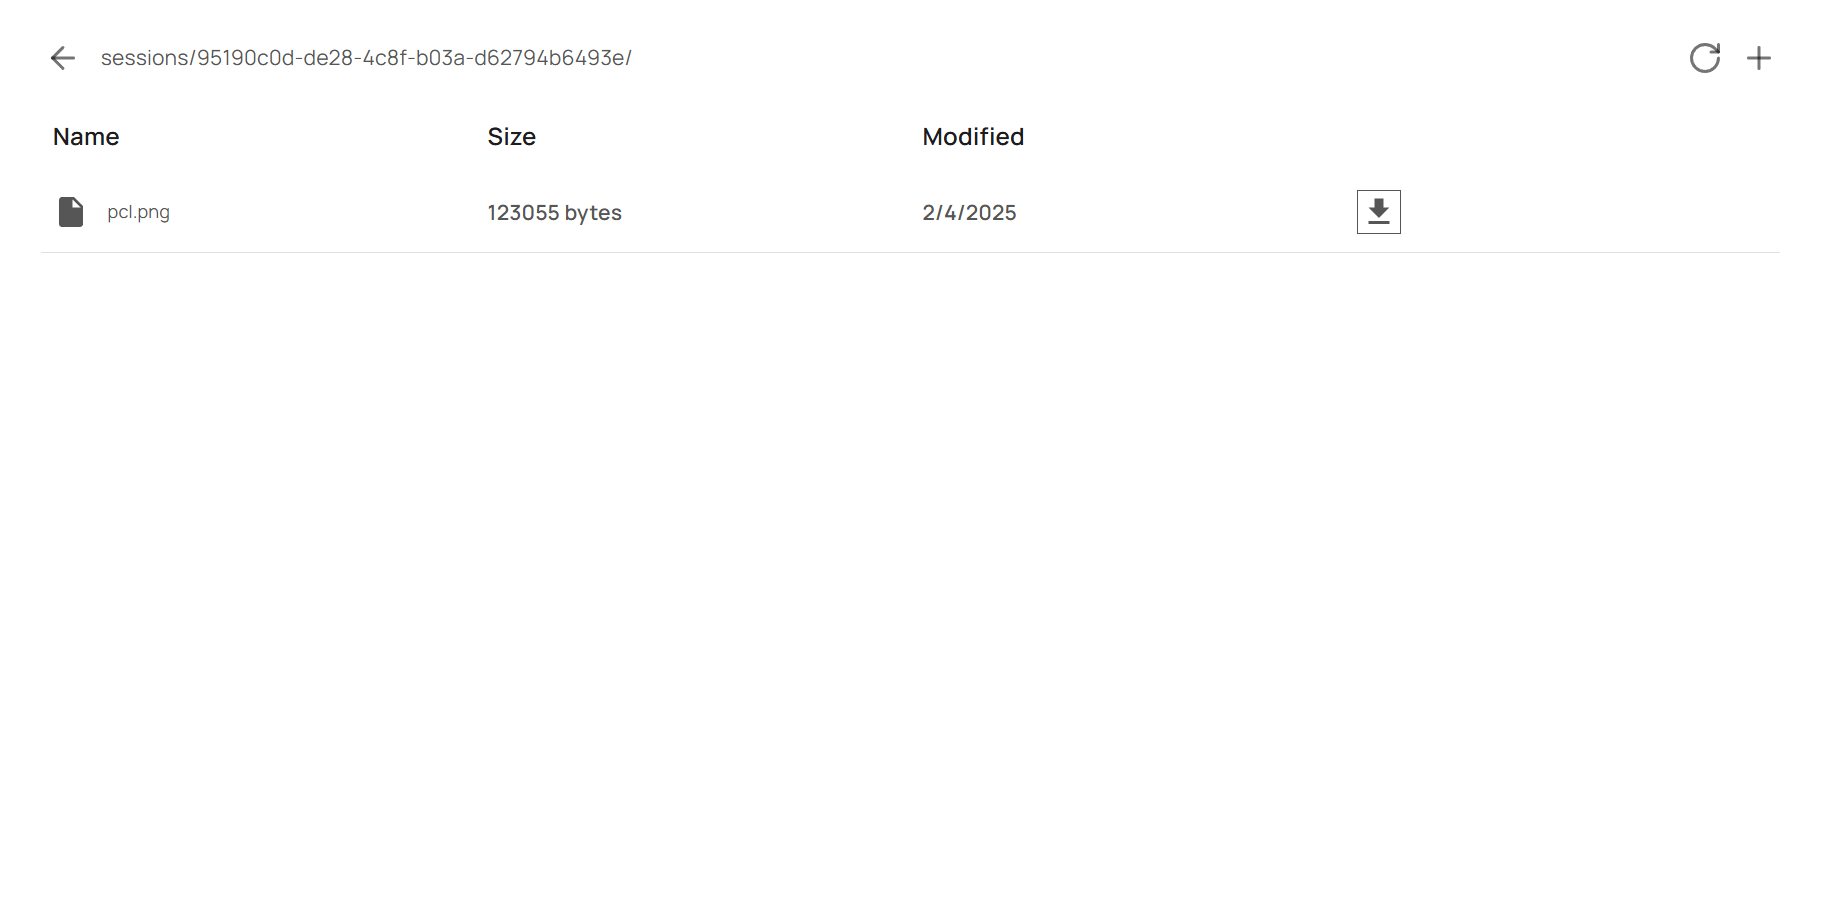 The saved point cloud is as follows: